Command Hooks Ripped Paint? Patch, Prime, Blend
Clara Townsend
Clara Townsend is an interior stylist, vintage furniture enthusiast, and the creative voice behind Velvet Abode. With over a decade of experience transforming both cramped city apartments and sprawling fixer-uppers, she believes that a beautiful home is built on personal stories rather than massive budgets. When she isn't hunting for the perfect brass sconce at a local flea market, she can usually be found rearranging her living room for the third time this month.
There is a very specific kind of panic that hits when you pull off a Command hook and a little curl of paint comes with it. It is not “my wall is ruined” panic, though. It is “my move-out is in three days and my landlord has a flashlight” panic.
The good news: most Command-strip paint tears are small, shallow, and totally repairable with a calm hand and the right order of operations. The secret is not just patching. It is patching, then priming only where it matters, then blending the paint so your eye slides right past the spot like it never happened.
First, figure out what actually tore
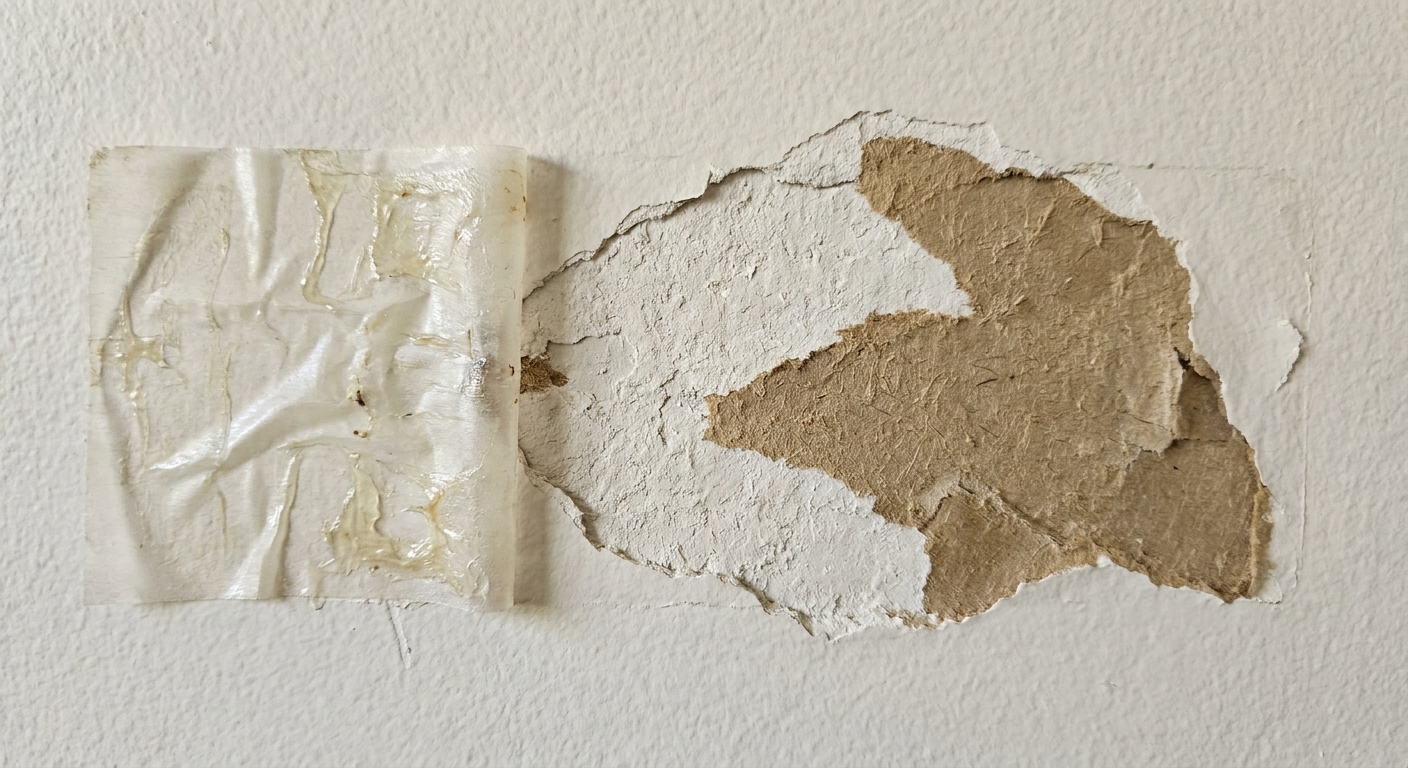
Before you open a tub of spackle, take ten seconds to diagnose what you are looking at. Your repair choice depends on whether you lost just paint, or paint plus drywall paper.
Quick wall-damage check
- Only paint lifted: The surface looks mostly intact, maybe with a slightly raised edge or a shallow chip. You are usually in “skim and feather” territory.
- Drywall paper tore (the brown fuzz shows): You will see brown or gray paper fibers, sometimes fuzzy. This needs sealing before you patch, or it can bubble and show through.
- A divot or dent: You can feel a low spot with your fingertip. You will need a filler that can build slightly, then sand smooth.
If the torn edges are flapping up, trim them. Use a sharp utility knife and cut away only what is loose. Do not keep picking, even if it is oddly satisfying.
Pick the right filler for the depth
Most people grab whatever is under the sink and hope for the best. For invisible repairs, choosing the right filler is half the battle.
For shallow surface tears
If the damage is mostly a chipped edge or a thin paint tear, reach for all-purpose joint compound or lightweight spackle and treat it like a skim coat. Joint compound spreads like frosting and is especially easy to feather out wide and thin, which is exactly what you want for blending.
For deeper divots
If you have a small dent, missing chunk, or you need to build the surface back up, choose lightweight spackle. It dries faster than joint compound, holds its shape well in small repairs, and sands easily. (For anything deeper than about 1/4 inch, plan on two thin layers instead of one thick gob.)
If drywall paper is torn, seal first
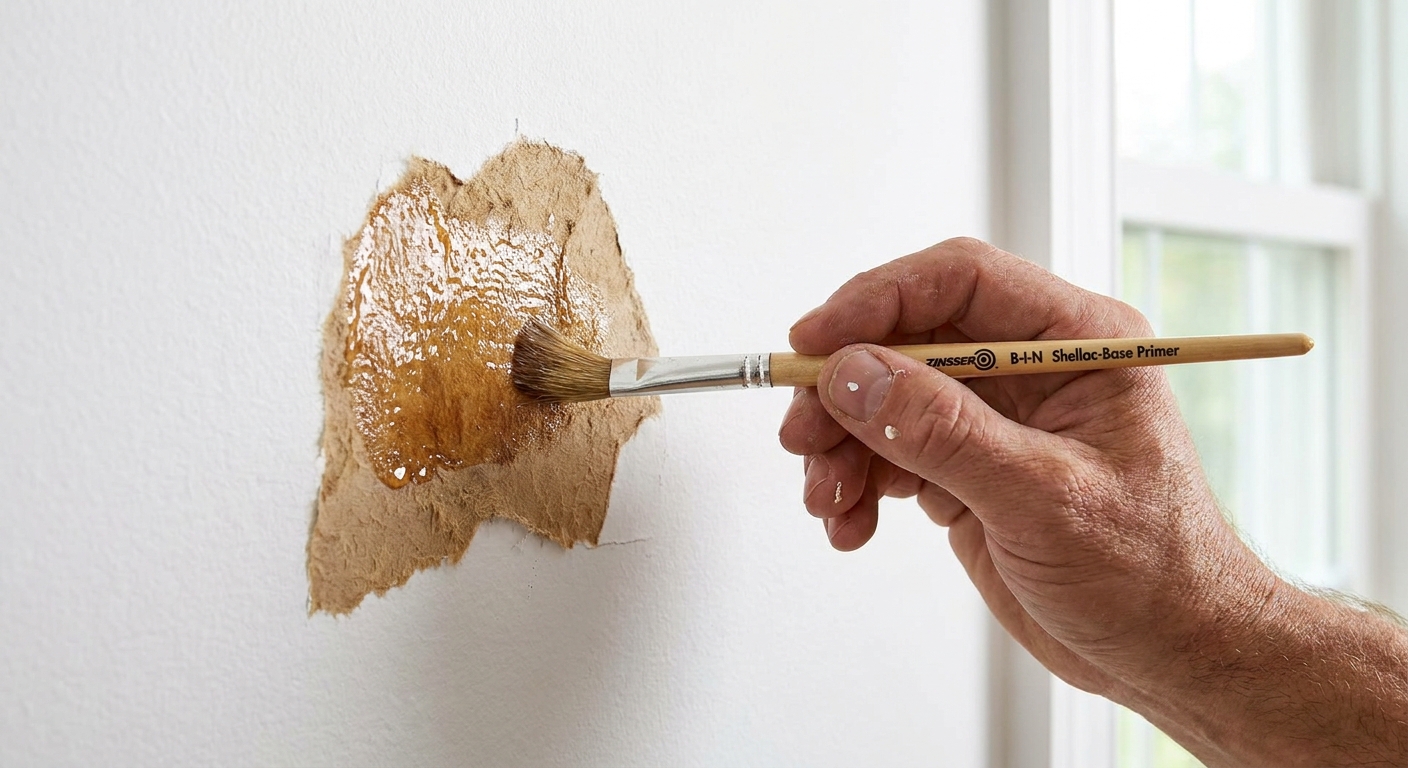
Exposed drywall paper is thirsty and can swell when it gets wet. Seal it before you apply any water-based filler. You have three solid options:
- Shellac-based primer: Fantastic sealer for torn paper. For tiny repairs, an aerosol shellac primer (like Zinsser B-I-N spray) is the least annoying cleanup. If you use the brush-on version, use a cheap disposable brush, foam swab, or a little piece of foam so you can toss it and move on with your life.
- Oil-based primer: Also seals paper well, but it has more odor and slower dry times.
- Dedicated torn-drywall sealer: A product like GARDZ is made for this exact “fuzzy paper” problem and is very renter-friendly.
This is the difference between “flat and smooth” and “why is there a puffy blister where my hook used to be?”
Feather-sand like you are blending makeup
The goal is not to sand the wall into oblivion. The goal is to make the transition from “repair” to “original wall” so gentle your eye cannot find it.
Tools that make this easier
- Sanding sponge (fine or extra-fine grit): My favorite for small wall repairs because it follows the surface.
- 150 to 220 grit sandpaper: Great on a small sanding block for crisp control.
- Damp microfiber cloth: Best for dust removal before primer. (Tack cloth is optional, but it can leave residue on some walls.)
The feathering method
After the filler dries, sand the center lightly. Knock down any ridges first.
Then widen your sanding area. Use lighter pressure as you move outward so the edge disappears gradually.
Close your eyes and run your fingertips over it. Your hand will catch what your eyes miss. You want “boring and smooth.”
If you sand through surrounding paint and create a larger dull halo, do not panic. It happens. It just means priming becomes more important for an even finish.
Small safety note: Drywall dust is not delicious. Crack a window, consider a basic dust mask, and put a towel down if you value your floors.
Spot prime to prevent flashing
“Flashing” is when your repair looks fine at night, then in daytime it shows up as a slightly different sheen or a ghostly patch. The culprit is often a porous repair area soaking paint differently than the rest of the wall.
When you must prime
- Any time you used joint compound or spackle
- Any time you exposed drywall paper
- Any time the wall looks chalky or sanded dull around the repair
Pick the right primer
- For most patches: Use a drywall primer, a patch and repair primer, or a quality multi-surface primer meant to equalize porosity. (Some “stain-blocking” water-based primers are more about light stains than patch absorption, so aim for porosity control.)
- For torn drywall paper: Shellac-based primer, oil-based primer, or a dedicated torn-paper sealer like GARDZ.
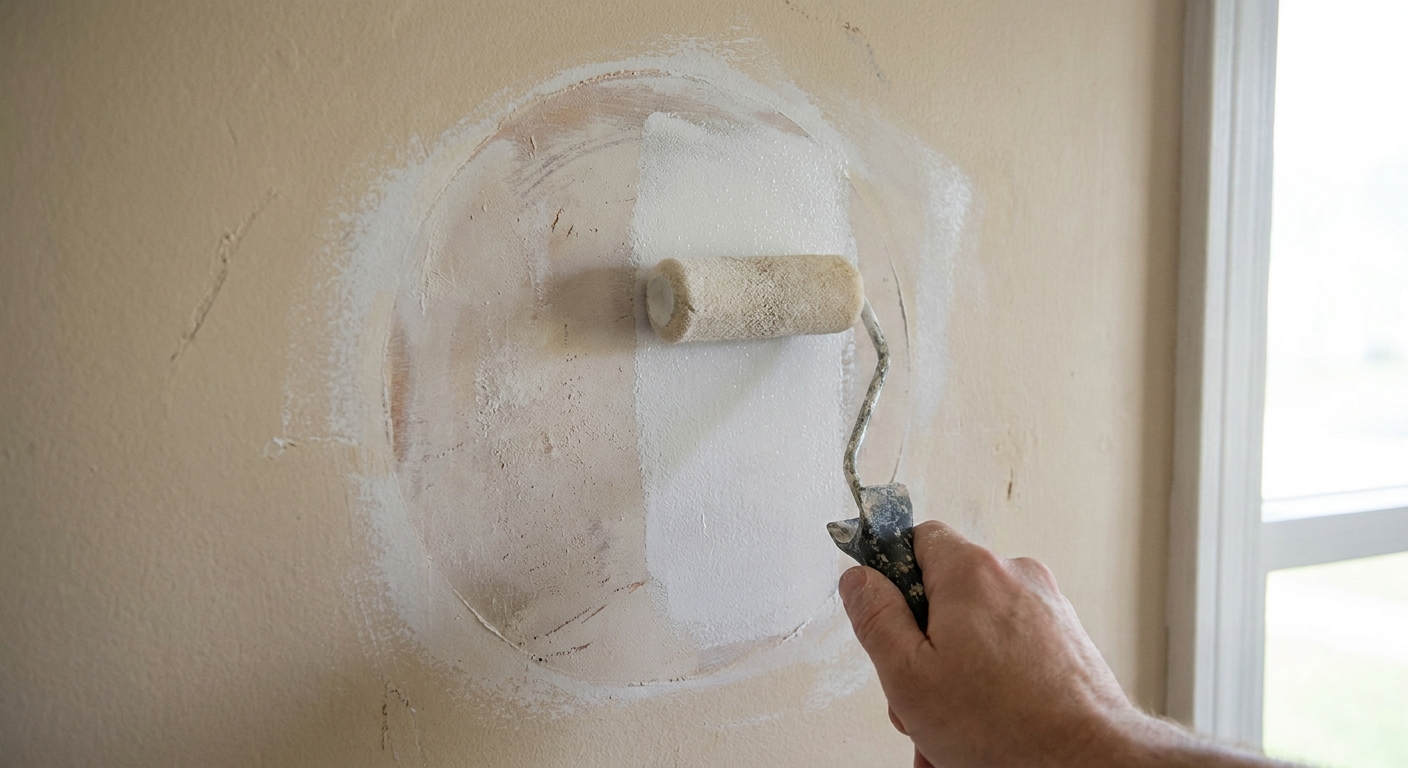
How to spot-prime without making a target
Use a small foam roller or soft mini roller and prime slightly beyond the patched area, then roll out the edges with lighter pressure. You want a soft perimeter, not a hard rectangle.
Blend the paint (sheen matters)
This is where most move-out repairs succeed or fail. Even if you have the correct color, sheen mismatch will show like a spotlight, especially with eggshell and satin finishes.
Step one: confirm the sheen
Look at the wall from an angle with a lamp or phone flashlight shining across it. If it looks velvety with almost no reflection, it is likely flat or matte. If it has a gentle glow, it is probably eggshell. If it looks noticeably shiny, you may be in satin territory.
Flat or matte walls (most forgiving)
- You can usually spot-paint. Use a small roller to match texture, not a brush that leaves a glossy stroke.
- Feather the edges. Roll from the center of the repair outward with less paint on the roller as you reach the edges.
- Two thin coats beat one thick coat. Thick paint creates a texture bump.
Eggshell or satin walls (more likely to flash)
- Plan to paint a larger area. Instead of just the patch, paint from corner to corner, or to the nearest natural break like a door frame, window trim, or inside corner.
- Use the same application method used on the wall. If the wall was rolled, roll your paint. Matching “orange peel” texture matters.
- Keep a wet edge. Work quickly so you do not leave lap marks that catch the light.
If you only have a tiny amount of matching paint and your wall is eggshell or satin, try a compromise: expand your paint-out zone generously and feather like you mean it. It will not be as bulletproof as corner-to-corner, but it often passes a normal move-out glance.
If you do not have matching paint
- Best move: Bring a small paint chip (from behind a switch plate, if allowed) to a paint store for color matching.
- Most foolproof move on eggshell or satin: Paint the whole wall.
Step-by-step repair (quick work, slow dry)
Here is the exact order I use when I want a Command-hook incident to disappear.
Time reality check: Hands-on work is often 15 to 60 minutes for a small patch, but dry times and coats can stretch this into several hours or a full day. Joint compound, humidity, and thicker fills are the usual culprits.
Remove loose paint. Trim flaps with a utility knife.
Seal torn drywall paper (only if needed). Use shellac primer (spray is easiest), oil primer, or a torn-paper sealer like GARDZ. Let it dry fully.
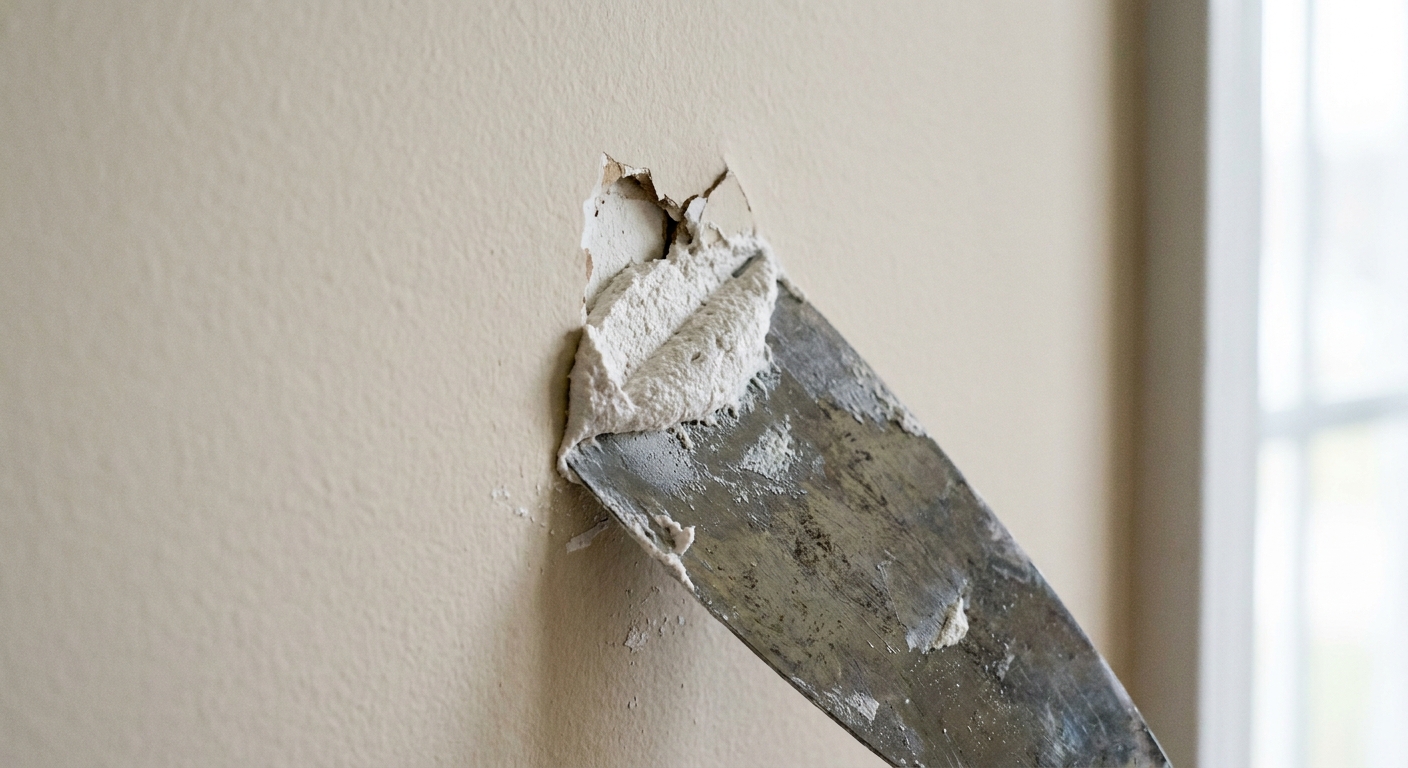
Apply filler. Use a putty knife to press lightweight spackle or joint compound into the spot. Keep it thin, and slightly overfill if there is a divot.
Let it dry. Follow the product label. If you rush, sanding turns gummy and uneven.
Sand smooth and feather wide. Fine grit, light pressure at the edges.
Dust clean. Wipe with a damp microfiber cloth. Let the wall fully dry before primer.
Spot prime. A soft-edged prime zone, slightly bigger than the patch.
Paint to blend. Match sheen and texture. Two thin coats. Feather edges.
Texture note: If your walls have noticeable orange-peel or roller stipple, use a mini roller with a slightly thicker nap (instead of a brush) so the patch does not look oddly smooth. If the texture is heavy, you may need a texture spray before priming and painting.
Move-out checklist: pass the flashlight test
If you are repairing for a walkthrough, check your work the way a picky inspection will.
- Check texture: Stand at a side angle and look for a raised patch edge.
- Check sheen: Shine a light across the wall at night. If you see a dull or shiny halo, you likely need better priming or a bigger paint blend area.
- Check color: Paint dries darker or lighter depending on the base. Evaluate after it fully dries.
- Clean the surrounding wall: Wipe smudges around the repair. A pristine patch on a slightly dusty wall can still look like a patch.
One extra tip from too many last-minute move-outs: keep your leftover paint can if you have it, and write the room name and date on the lid. Future-you will feel very loved.
Common mistakes
- Skipping primer: This is the number one reason patches show up later as a different sheen.
- Using a brush on rolled walls: Brush marks catch light differently and telegraph the repair.
- Not feathering the filler: A hard ridge around the patch reads as a “badge.”
- Painting too small of an area on eggshell or satin: If your wall has any glow, you often need to paint bigger than feels logical.
- Over-sanding surrounding paint: It creates a wide dull area. If it happens, prime it and blend paint wider.
If you are rehanging next time
Because I cannot help myself: if you are going to use Command products again, a few tiny habits reduce the risk of a repeat performance.
- Remove slowly, straight down. Do not pull outward from the wall.
- Warm the adhesive first. A hair dryer on low for 20 to 30 seconds can soften stubborn strips.
- Avoid uncured paint. Wait until the paint is fully cured before using adhesives. This is often 2 to 4 weeks, depending on paint type and humidity.
- When in doubt, test behind a door. A hidden spot tells you how delicate the paint is.
Your home should be allowed to hold your life, your art, your favorite thrifted mirror, and yes, even your impulsive gallery wall phase. A little patch and prime is just part of the story.