Clean Range Hood Filters and Degrease Stainless Without Scratches
Clara Townsend
Clara Townsend is an interior stylist, vintage furniture enthusiast, and the creative voice behind Velvet Abode. With over a decade of experience transforming both cramped city apartments and sprawling fixer-uppers, she believes that a beautiful home is built on personal stories rather than massive budgets. When she isn't hunting for the perfect brass sconce at a local flea market, she can usually be found rearranging her living room for the third time this month.
If your kitchen has that faint, sticky sheen that seems to come back five minutes after you wipe, your range hood is usually the quiet culprit. A clogged filter cannot grab much airborne grease, so it drifts, settles on cabinet doors, and turns into that stubborn film that makes everything feel a little grimy. And even with a clean filter, an underpowered hood or tricky ducting can still let some grease escape, so do not blame yourself if you are doing everything “right” and still see buildup.
The good news: you do not need a harsh degreaser or a new hood. You just need the right expectations for your filter type, a hot soak that does most of the work, and a stainless steel wipe-down that follows the grain so you do not end up with a permanently scuffed front panel.
Quick safety note: Let the hood and filters cool completely before you touch them. Grease can be sharp and messy, so gloves help. Use very hot water carefully so you do not burn yourself.
Know your filter type
Before you scrub anything, figure out what you have. Rentals are notorious for mismatched filters, missing charcoal inserts, and years of cooking trapped in a metal grid.
Mesh filters
Most common in apartments. They look like layered aluminum screen. They are designed to catch grease, and they need regular washing. Mesh filters can bend if you get aggressive with a stiff brush, so let soaking do the heavy lifting.
Baffle filters
Often found on higher-powered hoods. They are made of interlocking stainless channels. They handle heavy cooking better, tend to clean up more easily than mesh, and usually tolerate dishwashers better, though there are caveats below. Some styles also have a small grease trough or cup that needs to be emptied and washed.
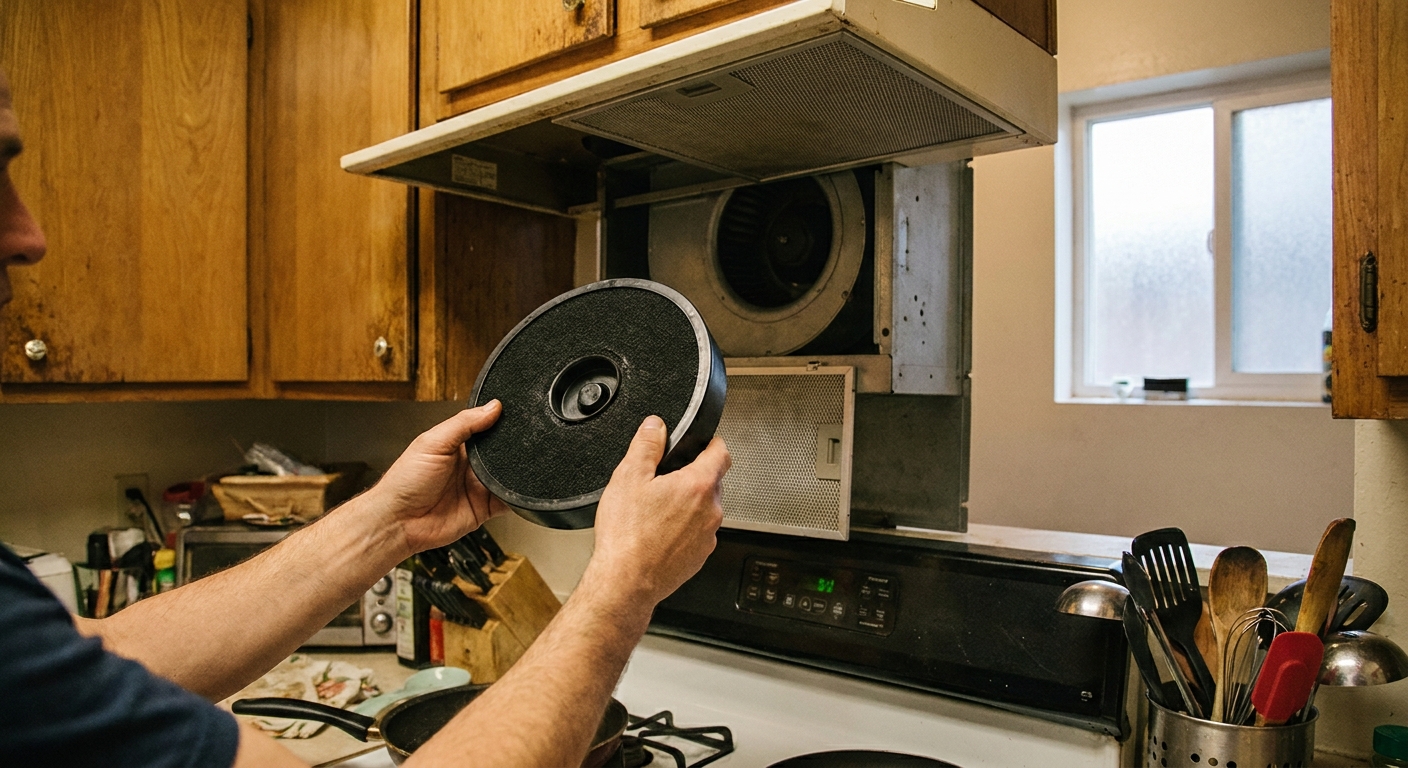
Charcoal (carbon) filters
These are for ductless, recirculating hoods. They are typically black or dark gray and feel lighter. Charcoal filters are not meant to be washed. They are replaced per manufacturer guidance, often every 2 to 6 months depending on how much you cook. If your hood recirculates and kitchen smells linger, the charcoal filter is usually overdue.
- Quick rental check: If you cannot find where air vents outside, or you feel airflow coming out of a grille on the hood itself, you likely have a ductless setup that uses charcoal filters.
- Another easy clue: Look in the cabinet above the hood (or above the microwave hood) for a duct going into the wall or ceiling. No duct usually means ductless, but some ducts hide well. When in doubt, look up the model number inside the hood.
- Maintenance reality: Landlords vary. Many consider charcoal filter replacement a tenant responsibility, like lightbulbs. Keep the receipt and the old filter if you want to be extra safe.
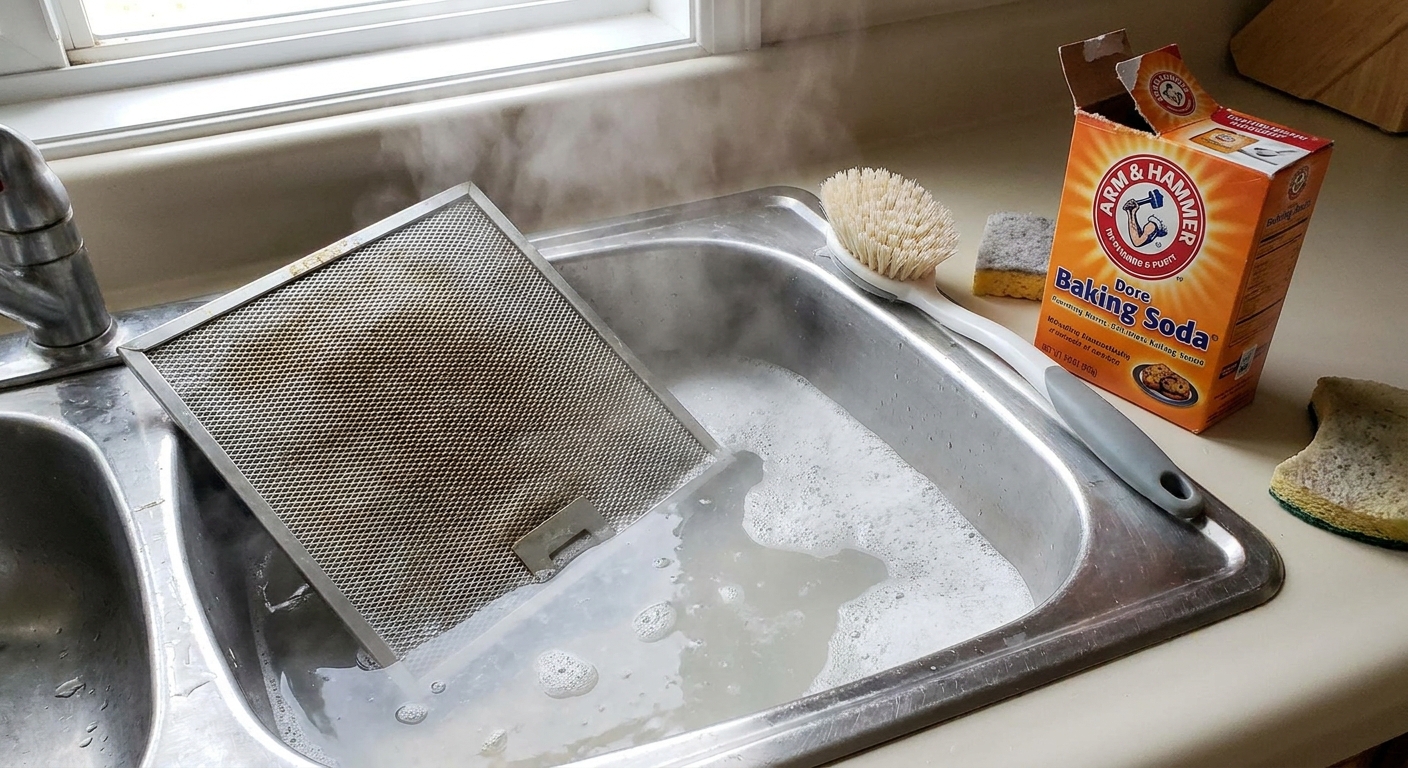
Soak and brush
This is my favorite approach because it is cheap, forgiving, and it does not require you to gas out your kitchen with aggressive chemicals. Think of it like loosening dried honey from a jar. Heat plus time is the magic.
What you need
- Dish soap that cuts grease
- Baking soda (optional but helpful)
- A non-scratch sponge or soft nylon brush
- Very hot water
- A towel or drying rack
Step-by-step
- Pop the filter out. Most filters have a small latch or spring tab. If it feels stuck, do not force it. Check for a hidden clip.
- Shake off loose dust. Do this into the trash, not your sink.
- Soak in very hot, soapy water. Fill a sink or a shallow tub. Add a generous squeeze of dish soap. For extra degreasing, sprinkle in 2 to 4 tablespoons of baking soda.
- Wait 15 to 30 minutes. For heavy buildup, go 45 minutes. The water should look cloudy and greasy by the end.
- Brush gently. Use a soft brush or non-scratch pad. On mesh, scrub lightly in one direction so you do not fray the screen layers.
- Rinse hot, then warm. Do a hot water rinse to help carry away grease, then a warm final rinse so you can handle it comfortably.
- Dry completely. Stand the filter on edge to drain, then air-dry. Putting a damp filter back can lead to odor and grime sticking faster.
If the grease is truly baked on: Repeat the soak once rather than escalating to something abrasive. Two gentle rounds beat one aggressive one that bends mesh or scuffs stainless.
Avoid this on aluminum: Skip caustic cleaners like oven cleaner or lye-based degreasers. They can pit, darken, or damage aluminum.
If your sink is too small: Use a plastic storage bin, a bathtub (with a towel under the filter to prevent scratches), or a rimmed sheet pan and carefully add very hot water in batches.
Dishwasher cleaning
Some filters can go in the dishwasher, but it is worth being strategic here. Dishwashers clean with high heat and strong detergent. That is great for grease and not always kind to finishes.
When the dishwasher is usually safe
- Stainless baffle filters: Often dishwasher-safe. Place them upright or angled so water can flow through the channels.
When to skip the dishwasher
- Most aluminum mesh filters: Many manufacturers recommend hand-washing. Dishwasher detergent can oxidize aluminum, leaving it dull or chalky, and heat can contribute to warping. It will often still function, but it may look permanently gray. If you cannot find your manual, hand-washing is the safer bet.
- If your dishwasher is already struggling: A very greasy filter can redistribute residue inside the machine, especially around the filter trap and door edges.
- If the filter is coated or painted: High heat can warp coatings and make them peel.
Dishwasher best practices
- Run the filter alone or with items like glass and ceramic that you do not mind getting a little greasy.
- Use a normal cycle, not the highest-heat setting.
- Skip heated dry if your filter is thin mesh that may warp.
- Afterward, wipe your dishwasher door gasket and run a quick rinse cycle if you see residue.

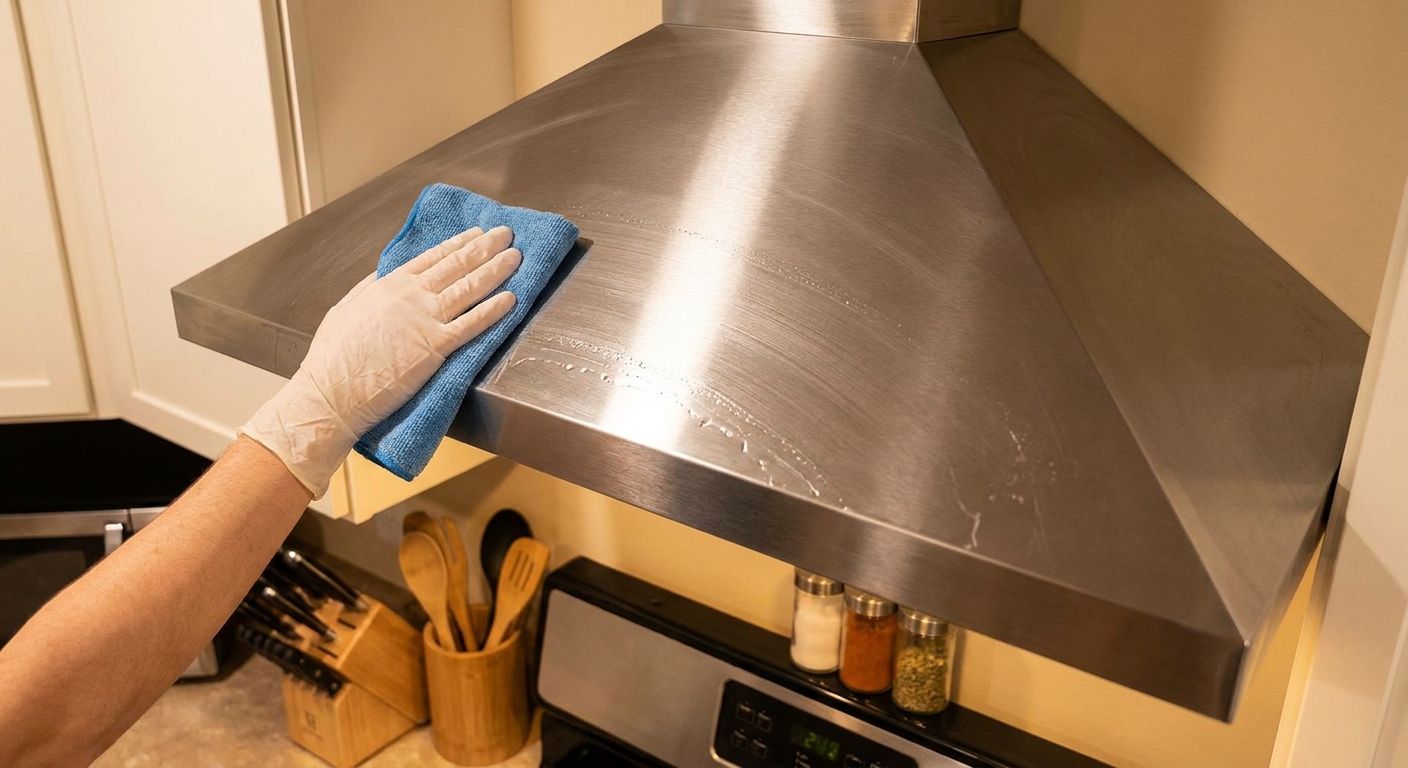
Degrease stainless safely
Stainless steel is one of those surfaces that looks effortlessly polished until you wipe it the wrong way and every streak suddenly shows. The trick is simple: gentle cleaner, soft cloth, and always with the grain.
Find the grain
Look closely under good light. You will see faint lines running horizontally or vertically. Wipe in that direction only. If you are unsure, test a small area and see which direction leaves fewer streaks.
A safe stainless routine
- Remove loose dust. Use a dry microfiber cloth first. Rubbing grit around is what causes micro-scratches.
- Degrease with a mild solution. Mix a few drops of dish soap in warm water. Dampen a microfiber cloth, wring it well, and wipe with the grain.
- Spot-treat sticky areas. For stubborn fingerprints and cooking residue, dampen the cloth with a 1:1 mix of white vinegar and water. Wipe with the grain, then rinse with a water-damp cloth.
- Dry immediately. Use a clean microfiber cloth to dry with the grain. This is the step that prevents water spots and cloudy haze.
- Optional shine and protection. Add a tiny drop of mineral oil to a cloth and buff with the grain. You want a whisper-thin layer, not a slick surface that attracts dust.
What not to use
- Abrasive powders (they scratch)
- Steel wool (it scratches and can leave rusting particles)
- Rough scrub sponges
- Chlorine bleach (can pit stainless)
If your stainless looks dingy even after cleaning: That is often built-up product residue plus fine grease. Do a warm soapy wipe, then a vinegar wipe, then a thorough clean-water wipe and dry. Save oils and polishes for the very end, and use a tiny amount.
How often to clean filters
If you cook daily, filters need more attention than you might think. Grease is airborne and sneaky, and once it builds up, it can start settling back down like a slow, sticky rain.
- Light cooking: Clean metal filters every 6 to 8 weeks.
- Regular weeknight cooking: Clean every 3 to 4 weeks.
- Heavy frying or high-heat searing: Clean every 1 to 2 weeks.
- Charcoal filters (ductless): Replace per your manual, often every 2 to 6 months, sooner if odors linger.
Clues it is time: The hood feels loud but ineffective, steam lingers, kitchen smells stay trapped, or you notice grease dots on the hood underside and cabinet faces.
Stop grease on cabinets
Even a clean filter cannot do everything if the hood is underused or your setup sends grease out sideways. These small tweaks make a surprisingly big difference, especially in rentals with modest airflow.
Use the hood early
Turn the fan on a few minutes before you start cooking so airflow is already moving. Keep it on for 10 to 15 minutes after you finish. This helps capture the lingering haze you cannot see but your cabinets definitely can.
Match fan speed to the moment
- Low for simmering
- Medium for sautéing
- High for frying, bacon, smash burgers, or anything that spits
If you worry about noise, treat high speed like a short sprint. Put it on high during the messiest part, then drop to medium.
Use a splatter strategy
- Use a splatter screen on pans that spit.
- Keep oil temperatures in check. Smoking oil creates more airborne residue.
- Center the pan under the hood. A pan pushed to the front burner edge sends grease up and out, not into the intake.
- If you have a microwave hood, use the back burners when possible.
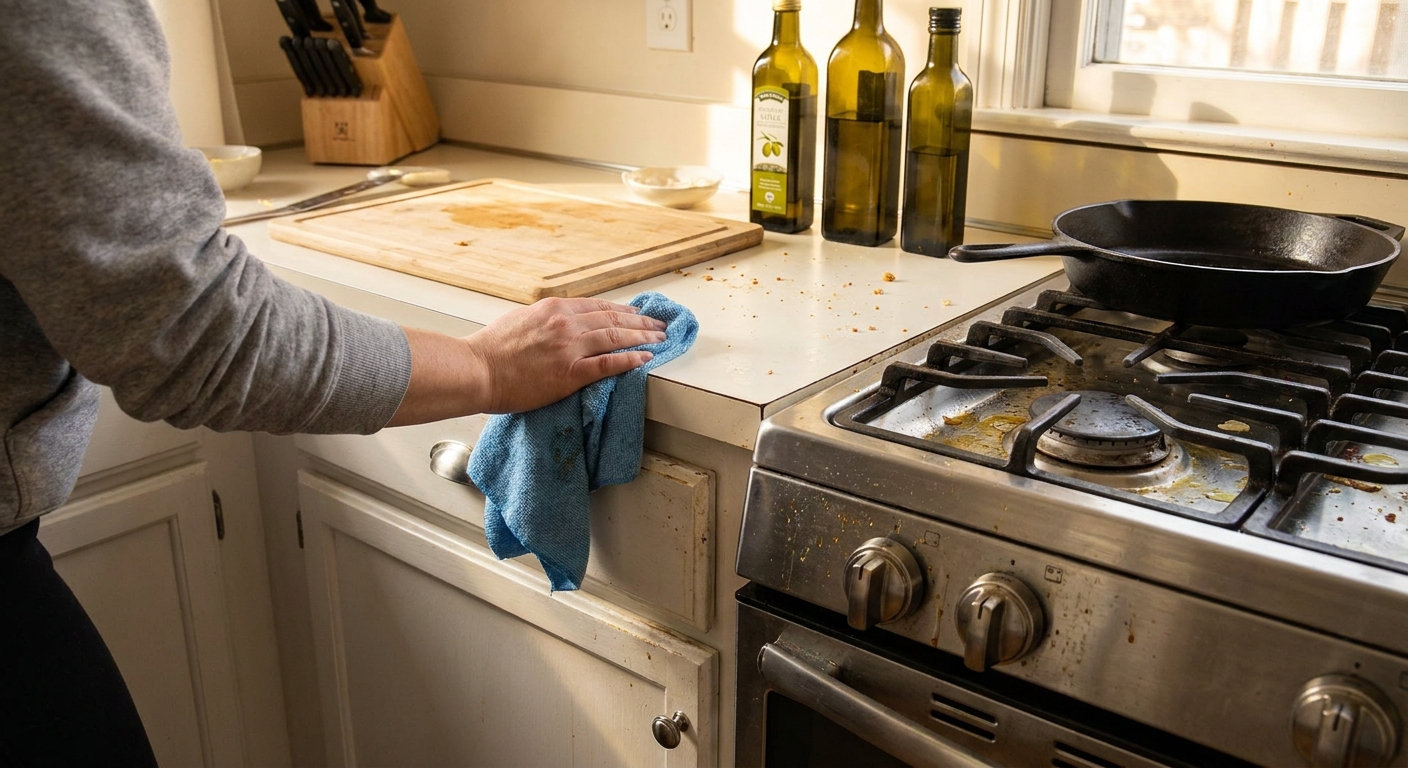
Do a quick cabinet wipe
After frying nights, do a quick pass on nearby cabinet doors with warm water and a drop of dish soap on a microfiber cloth, then dry. This takes two minutes and prevents the slow build-up that eventually feels like you need a whole weekend to fix it.
Troubleshooting
The filter is clean but airflow still feels weak
- Make sure the fan is actually turned on, not just the hood light.
- Check that the filter is seated correctly. Gaps let grease bypass the filter.
- If your hood is convertible, confirm it is set up for the right mode (exhausting outside versus recirculating). This is sometimes a simple internal plate or diverter, sometimes a landlord-level fix.
- If ducted, the exterior vent flap could be stuck. This is usually a landlord or maintenance call.
- If ductless, replace the charcoal filter. A saturated charcoal filter can make the hood feel useless.
The filter smells even after washing
Soak again with fresh hot water and soap, and let it dry fully. Lingering odor is often trapped moisture plus grease. If it is a charcoal filter, replace it.
The stainless front keeps streaking
Usually it is product buildup. Go back to basics: warm soapy wipe, clean-water wipe, then dry with the grain. Save oils and polishes for the very end, and use a tiny amount.
Quick renter-friendly reset
- Clean metal filters with a hot soak and gentle brush
- Replace charcoal filters if ductless (follow your manual)
- Wipe stainless with the grain using microfiber and mild cleaner
- Run the hood before, during, and after heavy cooking
- Do a two-minute cabinet wipe after frying nights
If you take nothing else from this: a clean filter is not just about smell. It is about keeping that soft, calm feeling in your kitchen, where cabinet doors look satiny instead of sticky, and stainless catches light without showing every swipe of a rushed sponge.