Ceramic and Porcelain Tile Cleaning Without Grout Damage
Clara Townsend
Clara Townsend is an interior stylist, vintage furniture enthusiast, and the creative voice behind Velvet Abode. With over a decade of experience transforming both cramped city apartments and sprawling fixer-uppers, she believes that a beautiful home is built on personal stories rather than massive budgets. When she isn't hunting for the perfect brass sconce at a local flea market, she can usually be found rearranging her living room for the third time this month.
If you have ceramic or porcelain tile, you already know the plot twist: the tile itself is tough, but the grout is the sensitive roommate who will absolutely complain if you use the wrong cleaner. The goal is not “strip it until it squeaks.” The goal is a calm, pH-aware routine that keeps grout from getting chalky, patchy, or hazy while your tile still looks bright and feels clean under bare feet.
Below is my Velvet Abode approach: gentle products, better mop habits, and a schedule that plays nicely alongside your streak-free routine for LVP or laminate. Different surface, different rules, same vibe: clean without drama.
Quick guardrail: This guide is for ceramic and porcelain floors. If you have natural stone nearby (marble, travertine, limestone, slate) or any specialty finish, follow the manufacturer’s care guide for that surface. Stone has its own chemistry rules.

Know your tile and grout
Ceramic and porcelain tiles are fired at high temperatures and finished with a hard surface. Many are glazed, but plenty are unglazed or through-body porcelain, and those can behave a little differently (they may show residue more easily and can be more sensitive to certain pigmented products if they are porous).
Quick check: glazed vs. unglazed vs. textured
- Glossy or glazed tile: Easier to wipe clean, more likely to show streaks and haze if you leave residue.
- Matte glazed tile: Hides streaks better, but can hold onto fine dust and oils in micro-texture.
- Unglazed or through-body porcelain: Durable, but can be more prone to visible films and may need extra attention to rinsing and thorough drying. When in doubt, use a cleaner labeled for unglazed porcelain and spot test.
- Textured or anti-slip tile: Great for wet areas, but it traps grime and needs a different tool than a string mop.
Quick check: sealed grout or not
If water darkens your grout line and takes a while to fade back, it is likely unsealed or the sealer has worn off. That does not mean you need harsh chemicals. It means you should be gentler and more consistent, and consider resealing after deep cleaning.
pH-safe cleaners
Grout and most tile finishes do best with cleaners that are close to neutral pH. Strong acids are the biggest long-term risk for cement-based grout (and any natural stone that might be nearby). Highly alkaline products are often tolerated by ceramic and porcelain tile, but they can strip some sealers, discolor some grouts, and leave a stubborn film if you do not rinse well.
Best everyday option
Look for a cleaner labeled pH-neutral or safe for tile and grout. Use the dilution listed on the bottle. More concentrate is not “more clean,” it is usually more residue.
When you need more power
- Greasy kitchen film: Use a gentle, diluted degreaser that is labeled safe for tile and grout, then rinse with clean water.
- Bathroom soap scum: Use a tile-safe bathroom cleaner, and rinse well. On floors, avoid leaving it to “sit” for long stretches since it can dry into residue.
- Mildew on grout: Spot treat with a grout-safe mildew remover and ventilate. Avoid using harsh bleach solutions as your default weekly approach.
What to avoid as a habit
- Vinegar or strong acids: The tile may survive, but repeated acid use can degrade cement-based grout over time and is a hard no for natural stone. Save acids for very specific, label-approved situations.
- Heavy-duty high-alkaline cleaners: They can leave film, dull the look of some finishes, and shorten the life of certain grout sealers if used routinely. If you use one, rinse like you mean it.
- Oil soaps and waxy “shine” products: They can build a film that grabs dirt and turns grout lines dingy faster.
If you are ever unsure, do a small test in a corner, let it dry completely, and check both the tile and grout in normal light.
Safety note: Never mix bleach with vinegar, acids, or ammonia. Use good ventilation with mildew products and follow the label instructions.
Mop habits that prevent haze
Let’s define the villain: the “haze” most people see in everyday life is usually residue (leftover cleaner, dirty water, or soap film). That is different from true post-installation grout haze (cement residue after grouting) and different again from efflorescence (white, powdery mineral salts migrating out of grout). The routine below targets the everyday residue kind.
Two-bucket method, apartment edition
You do not need a professional setup. You just need one bucket for cleaner and one bucket for rinse water, or one bucket plus a large bowl for rinsing your mop pad. This keeps you from wiping dirty water back into grout lines.
- Bucket 1: Warm water + diluted pH-neutral cleaner.
- Bucket 2: Clean warm water for rinsing your mop pad. Swap it out when it turns cloudy, not when it looks tragic.
Use less water than you think
Tile can handle moisture, but grout can soak it up. A well-wrung microfiber flat mop cleans better than a dripping mop because it lifts soil instead of flooding it into the grout.
Work in small sections
Clean a 3x3 ft area (about 1x1 m), then rinse that section with a clean damp pad or a quick pass with clean water. This tiny habit is what keeps residue from drying into a dull veil.
Change the water early
If your water looks like weak latte, it is time. Dirty water is how bright grout becomes a permanent “mystery beige.”
Textured tile
Textured tile is wonderful in entryways, bathrooms, and tiny kitchens where you want traction. It is also a magnet for grit. The trick is to pair the right scrub with the right rinse so grime does not settle into the grooves.
Tools that help
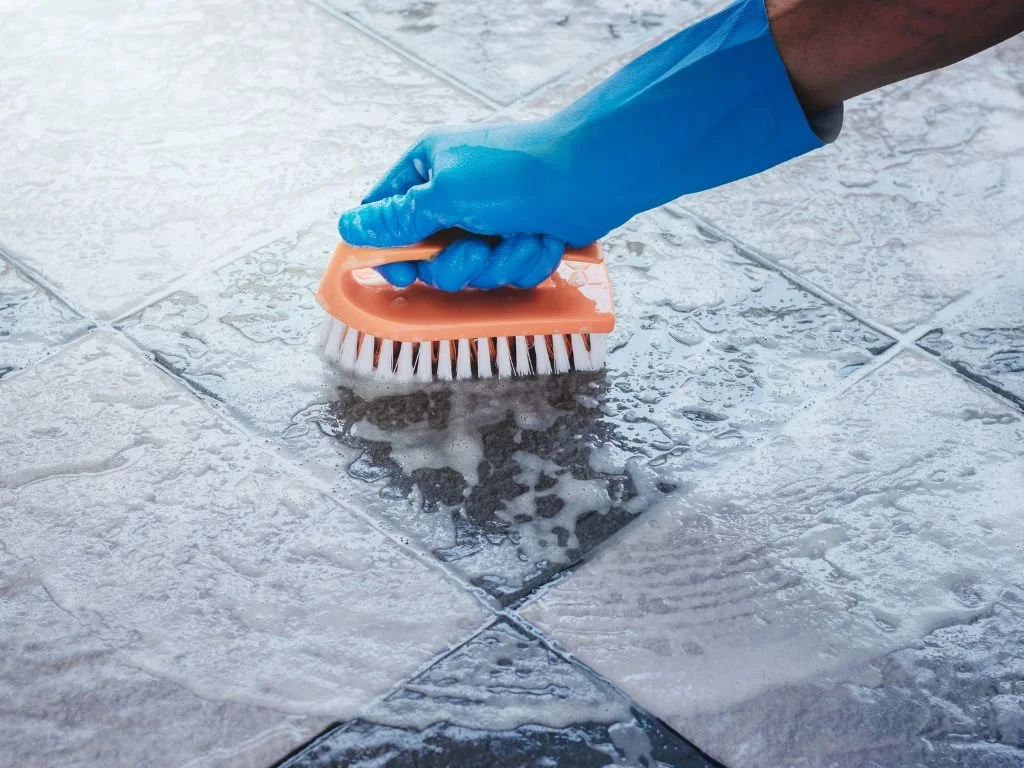
- Soft-bristle brush: Ideal for textured tile and grout lines. Choose nylon bristles, not metal.
- Microfiber scrub pad or mop pad: More grab than a smooth pad, still gentle.
- Vacuum with a hard-floor setting: Your best friend before you add any water.
My method for textured tile
Dry clean first: Vacuum or sweep thoroughly, including along baseboards where grit likes to hide.
Apply cleaner lightly: A spray bottle with diluted pH-neutral cleaner gives more control than dumping mop water everywhere.
Agitate gently: Use a soft brush for the texture and grout intersections. Think “polishing,” not “punishing.”
Rinse: Wipe with a clean, damp microfiber pad to pick up loosened soil.
Dry: Leftover product plus moisture is what creates slippery, filmy floors, even on “grippy” tile.
Drying matters
In a small space, you cannot “just avoid the kitchen for an hour.” Drying is your safety step and your finish step. It prevents slips, stops residue from drying on the surface, and keeps grout from staying damp longer than necessary.
Fast drying habits
- Ventilation: Open a window or run the bathroom fan for at least 20 minutes.
- Microfiber towel pass: After mopping, drag a dry microfiber towel under your foot and do a quick skate across the floor. It is oddly satisfying.
- Entryway rule: If your tile starts at the door, keep a mat outside and a washable rug inside. Less grit in means less scrubbing later.
If your tile feels slippery
That is usually leftover product. Do a rinse-only mop with clean warm water and a fresh pad, then dry. Most “slippery tile” issues are residue issues.
A simple schedule
This is meant to complement your other floor routines without duplicating them. Tile and grout respond best to steady, light maintenance with occasional targeted deep cleaning.
Daily or every other day
- Dry sweep or vacuum to remove grit. Grit can abrade grout over time and dull the look of tile.
- Spot wipe spills quickly, especially coffee, tea, tomato sauce, and anything oily.
Weekly
- Mop with a pH-neutral cleaner using a well-wrung microfiber mop.
- Rinse pass if needed, especially on glossy tile, unglazed porcelain, or if you used more cleaner than usual.
Monthly
- Spot scrub grout lines in the dirtiest zones: stove area, sink front, entry path.
- Clean textured tile with a soft brush and controlled spray cleaner.
Every 6 to 12 months
- Consider resealing grout if it is unsealed or if water darkens it quickly.
- Do a deeper clean first, let everything dry fully, then seal per product instructions.
Sealing grout
Sealing is not a makeover. It is a raincoat. It helps grout resist staining and makes routine cleaning easier, but it does not make grout stain-proof.
What to know
- Choose the right sealer: A penetrating sealer is the most common choice for cementitious grout.
- Dry time matters: Sealers need a fully dry surface. After deep cleaning, wait until the grout is completely dry (often 24 to 48 hours, longer in humid bathrooms) and then follow the product cure time before heavy traffic.
- Less is more: Apply carefully to the grout lines and wipe excess off the tile so you do not create a sticky film.
Stains and stubborn grout
When grout is stained, you are usually dealing with one of three things: trapped soil, oil, or organic staining. Start gentle, then step up.
Step-up plan
Warm water + pH-neutral cleaner: Let it dwell for a few minutes, scrub lightly, rinse, dry.
Oxygen bleach (sodium percarbonate) paste: Often a better option than chlorine bleach for many grout situations, but still spot test, especially on colored grout and around adjacent materials. Mix to a paste, apply to grout only, let sit per instructions, scrub gently, rinse very well.
Grout-specific cleaner: Choose one designed for ceramic and porcelain tile, then follow directions exactly.
A note on bleach
Chlorine bleach can lighten grout, but it can also weaken it over time and does not always remove the underlying soil that causes recurring discoloration. If you use it, treat it as occasional spot help, not your weekly plan. And never mix it with vinegar, acids, or ammonia.
Efflorescence and white powder
If you see a white, dusty, powdery film that returns even after cleaning, you may be dealing with efflorescence. That is mineral salt residue moving through moisture in the grout or subfloor.
What to do
- Start with a dry brush or vacuum to remove loose powder.
- Clean with a pH-neutral cleaner and rinse thoroughly.
- Improve drying and ventilation, since moisture is the delivery system.
- If the product label explicitly approves it for your surface, an efflorescence remover may help, but use with caution and rinse thoroughly. When in doubt, call a pro, especially if natural stone is present.
Steam mops
Steam mops sound like the perfect shortcut, but many tile and grout manufacturers discourage them because heat and moisture can stress grout, soften some sealers, and push moisture into edges and transitions. If you love yours, check your tile, grout, and sealer guidance first, and avoid lingering in one spot.
Common mistakes
- Using vinegar weekly: It is a recurring “natural” tip that can become an expensive grout problem (and it is unsafe for natural stone).
- Too much cleaner: The floor looks clean while wet, then dries hazy and attracts more dirt.
- Skipping the dry clean: Wet mopping on top of grit = muddy grout lines.
- Using rough brushes: Aggressive scrubbing can fray grout and make it hold more grime later.
- Letting floors air-dry in a humid bathroom: Damp lingers, and so does mildew potential.
My grout-safe tile kit
If you want a minimal setup that actually gets used, here is what I keep on hand:
- pH-neutral tile and grout cleaner
- Microfiber flat mop with washable pads
- Soft-bristle hand brush for grout and texture
- Spray bottle for diluted cleaner (great for small apartments)
- Two microfiber towels for drying and buffing
Your tile does not need a dozen specialty bottles. It needs the right pH, clean water, and a finish step that respects how grout behaves.
When to call a pro
If your grout is crumbling, the tile has persistent haze that does not improve with rinsing, you keep getting efflorescence, or you are dealing with widespread mold due to ventilation issues, it may be time for professional cleaning or regrouting. A good pro can also deep clean and then seal grout evenly, which can be a game changer for older floors.
And if you take nothing else from this page, take this: grout loves consistency. The gentler your weekly routine, the less you will feel tempted to “scorch the earth” later.