Butcher Block Counters and Islands
Clara Townsend
Clara Townsend is an interior stylist, vintage furniture enthusiast, and the creative voice behind Velvet Abode. With over a decade of experience transforming both cramped city apartments and sprawling fixer-uppers, she believes that a beautiful home is built on personal stories rather than massive budgets. When she isn't hunting for the perfect brass sconce at a local flea market, she can usually be found rearranging her living room for the third time this month.
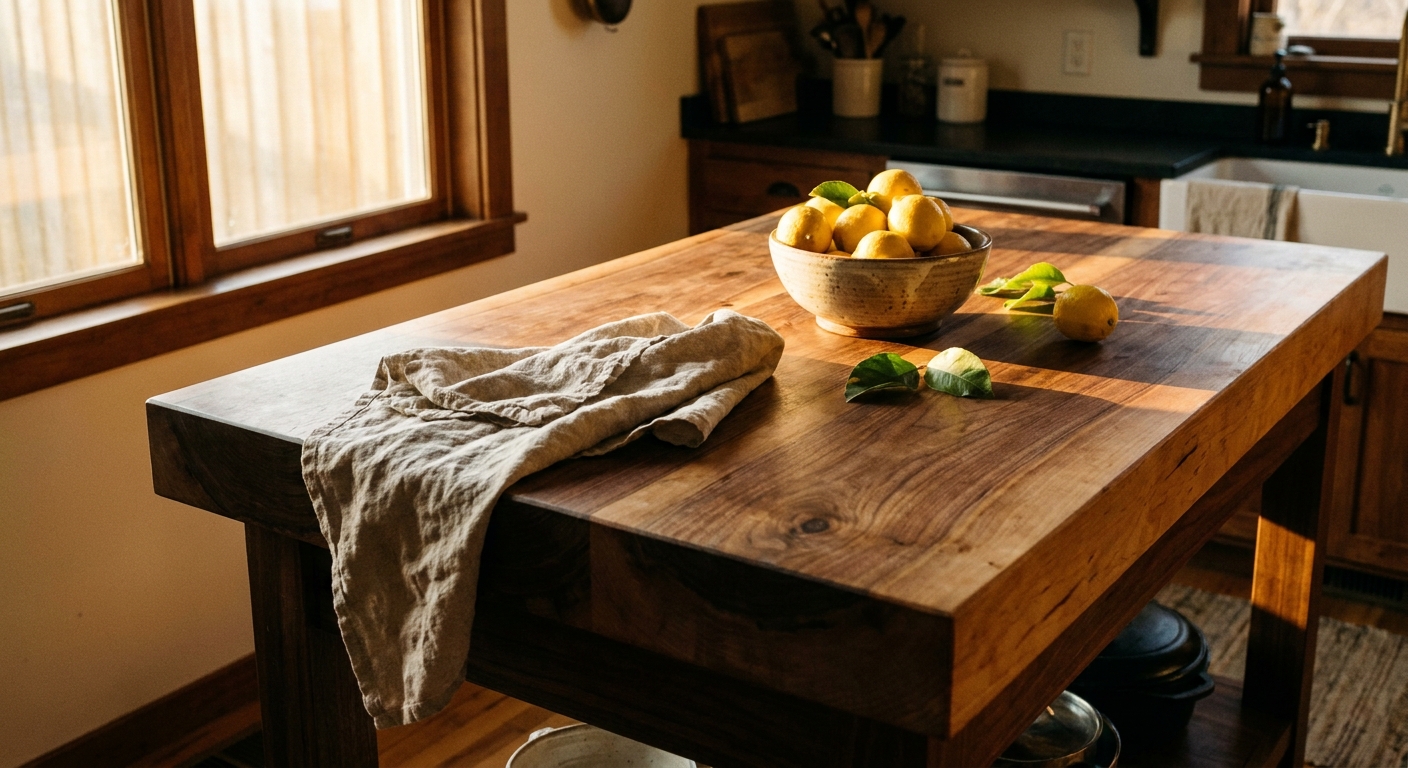
Butcher block is one of those materials that feels like a living thing. It warms up a kitchen instantly, it forgives an imperfect day, and it looks even better once it has a little history. The catch is that wood responds to water, heat, and dryness. If you treat it like stone, it can crack, cup, or get that tired, fuzzy texture that makes you avoid touching it.
The good news: maintaining butcher block is simple when you commit to two habits. Keep it conditioned with the right finish, and keep moisture from camping out in the same spots every day. I will walk you through a routine that is food-safe, realistic, and designed to prevent cracking without babying your kitchen.
Know your finish
Before you buy anything, do a quick check. Your maintenance plan depends on whether your wood is meant to be oiled (a penetrating finish) or sealed (a film finish).
Quick water test: place a few drops of water on the surface and watch for about 60 seconds, then wipe it up.
- If water beads up and stays beaded for a minute or more, you likely have a sealed surface (polyurethane, conversion varnish, or another hard film finish). You should not oil over a film finish.
- If water darkens the wood quickly (within seconds), it is unfinished or oil-finished. This article is mainly for you.
- If water beads briefly, then starts to darken, you may have an oil-plus-wax routine already, or an oiled surface that is freshly conditioned. When in doubt, do a tiny test on an underside overhang.
If you are unsure, check paperwork from your installer. The goal is not perfection, it is avoiding the wrong product on the wrong finish.
Mineral oil vs wax blends
Let’s make this uncomplicated: for most butcher block counters and islands, the classic go-to is food-grade mineral oil. It is stable, odorless, won’t go rancid, and is easy to refresh.
Mineral oil (penetrating, simplest)
- Best for: daily-use counters, prep zones, families, renters who inherited a wood top.
- Look and feel: a natural matte to soft satin, with grain that looks “fed.”
- Maintenance: more frequent, but very forgiving.
Oil plus wax blends (more spill resistance)
- Best for: people who want a slightly richer sheen and a bit more spill resistance.
- Look and feel: smoother, slightly more polished, often more fingerprint-friendly.
- Maintenance: often less frequent than straight oil, but it is product-dependent. You still need to buff well so it does not feel tacky.
A note about cooking oils
Avoid olive oil, vegetable oil, and anything that can oxidize and turn sticky or smell off over time. If you want a plant-based option, look for products formulated for countertops (often walnut oil that is heat-treated or polymerized). If allergies are a concern in your household, mineral oil is the most neutral choice.
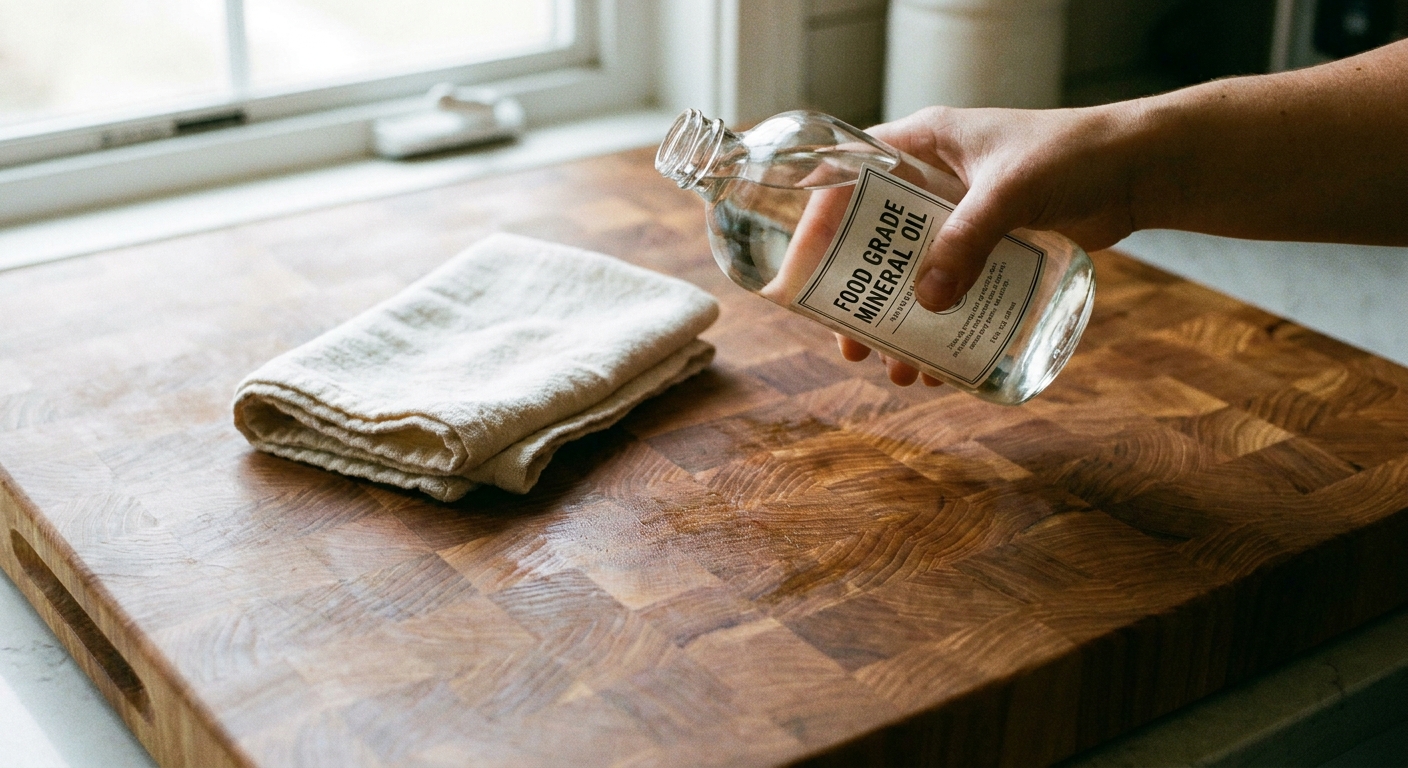
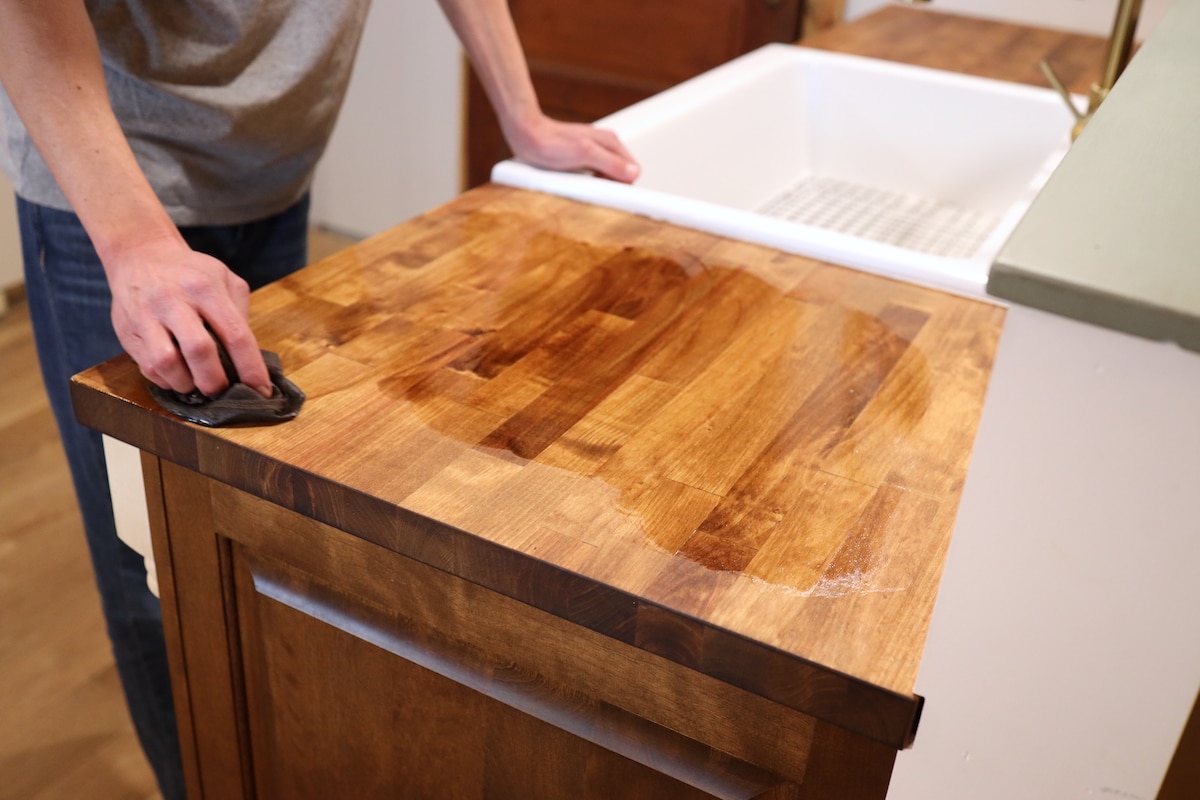
How to oil without greasy buildup
The trick is thin coats and patience. Think of it like skincare, not like painting a wall.
First-time oiling or very dry wood
- Step 1: Clean the surface and let it dry fully.
- Step 2: Pour a small amount of mineral oil onto the wood or onto a lint-free cloth.
- Step 3: Rub it in with the grain, covering the whole surface including edges and any exposed end grain.
- Step 4: Let it soak for 20 to 30 minutes. If the wood drinks it immediately and looks dry again, apply a second light coat.
- Step 5: Wipe off any excess until the surface feels dry to the touch. No slick shine, no oily residue.
How often?
- New installs or very dry wood: once a week for the first month is common.
- After it stabilizes: about once a month, or whenever the surface looks dull and thirsty.
- Seasonal reality: in winter heating months, many homes need more conditioning because indoor air gets dry.
If you use an oil plus wax blend, apply an even thinner coat and buff well with a clean cloth after it hazes. The surface should feel silky, not draggy.
Rag safety (quick but important)
Mineral oil rags are low risk because mineral oil does not cure like a drying oil. Still, some blends include curing oils. To be safe, lay used rags flat to dry before tossing, or store them in a sealed metal container until disposal.
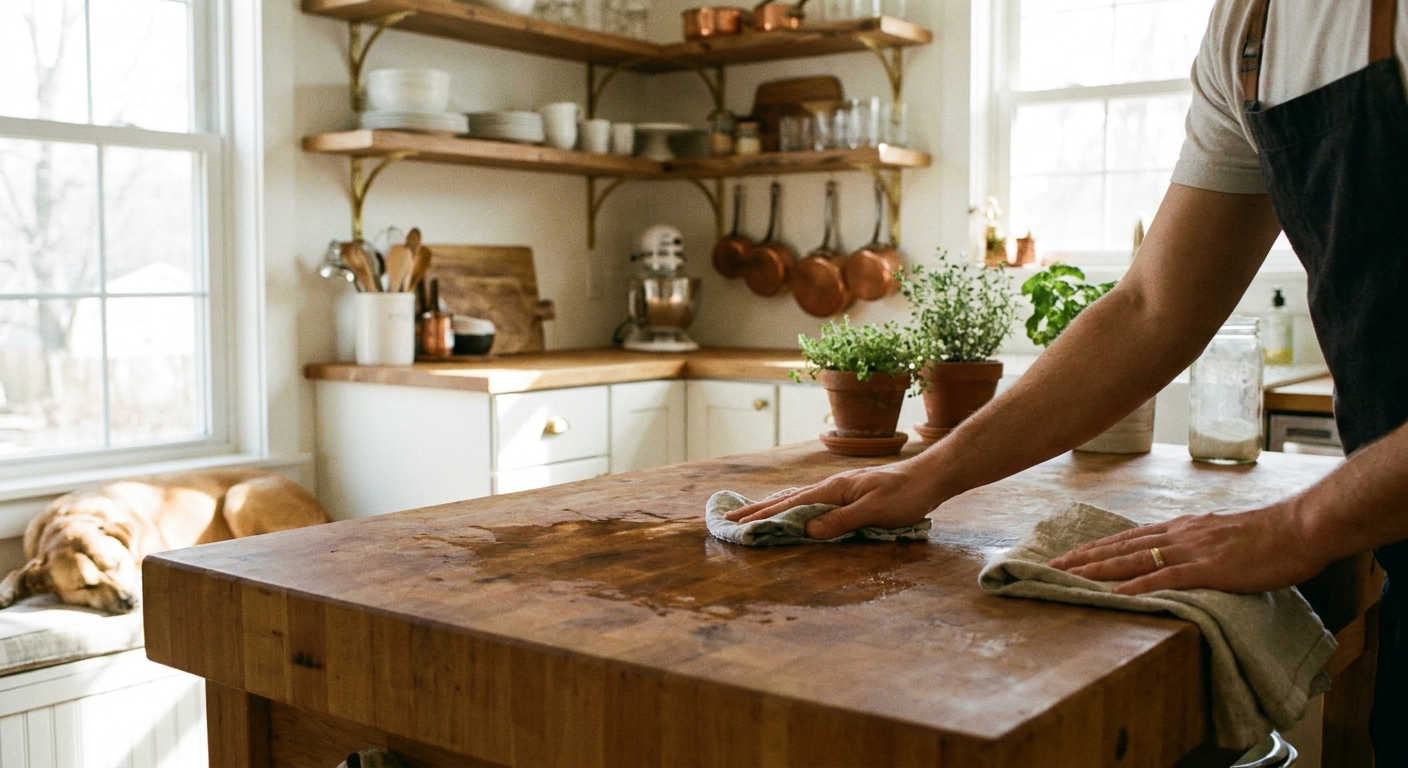
Clean daily, sanitize as needed
Daily cleaning is where people accidentally create problems. Wood hates standing water, and it also does not love strong cleaners left to sit. Most damage comes from moisture cycling and neglect, not from a quick wipe down. You can absolutely keep butcher block hygienic, you just want short contact time and a dry finish.
Your everyday clean (after cooking)
- Wipe crumbs and spills promptly.
- Use a damp cloth with a drop of mild dish soap.
- Wipe again with a clean damp cloth to remove soap residue.
- Dry immediately with a towel. This one step prevents so much swelling and raised grain.
Deodorize and freshen
- White vinegar solution: a 1:1 mix of vinegar and water in a spray bottle works well for routine deodorizing and general cleaning. Mist lightly, wipe, then dry. Vinegar is not a dependable disinfectant for all foodborne pathogens at household strength, so think of this as a cleaner, not your one-and-only sanitizer.
Sanitize options (occasional)
If you want true disinfection, follow product labels and choose methods appropriate for food surfaces. Keep the wood lightly damp, not soaked, and always dry thoroughly afterward.
- Hydrogen peroxide (3%): useful for occasional sanitizing. Lightly mist, let sit for a few minutes, then wipe and dry. Do not leave puddles.
- Diluted bleach (only when needed): for higher-risk messes (like raw meat juices), you can use a bleach solution such as 4 teaspoons of unscented household bleach per 1 quart of water. Apply lightly, let it sit for about 1 minute, then rinse with clean water, and dry thoroughly. Bleach can discolor wood and can be hard on some finishes, so use sparingly and do not let it linger.
- EPA-registered disinfectant: if you use one, follow the label exactly for dilution, contact time, and whether a rinse is required on food-contact surfaces. Then dry.
What to avoid
- Steam cleaners and soaking wet cloths
- Ammonia-heavy sprays
- Abrasive powders that shred the fibers
- Letting cleaning or sanitizing liquids air-dry on the surface
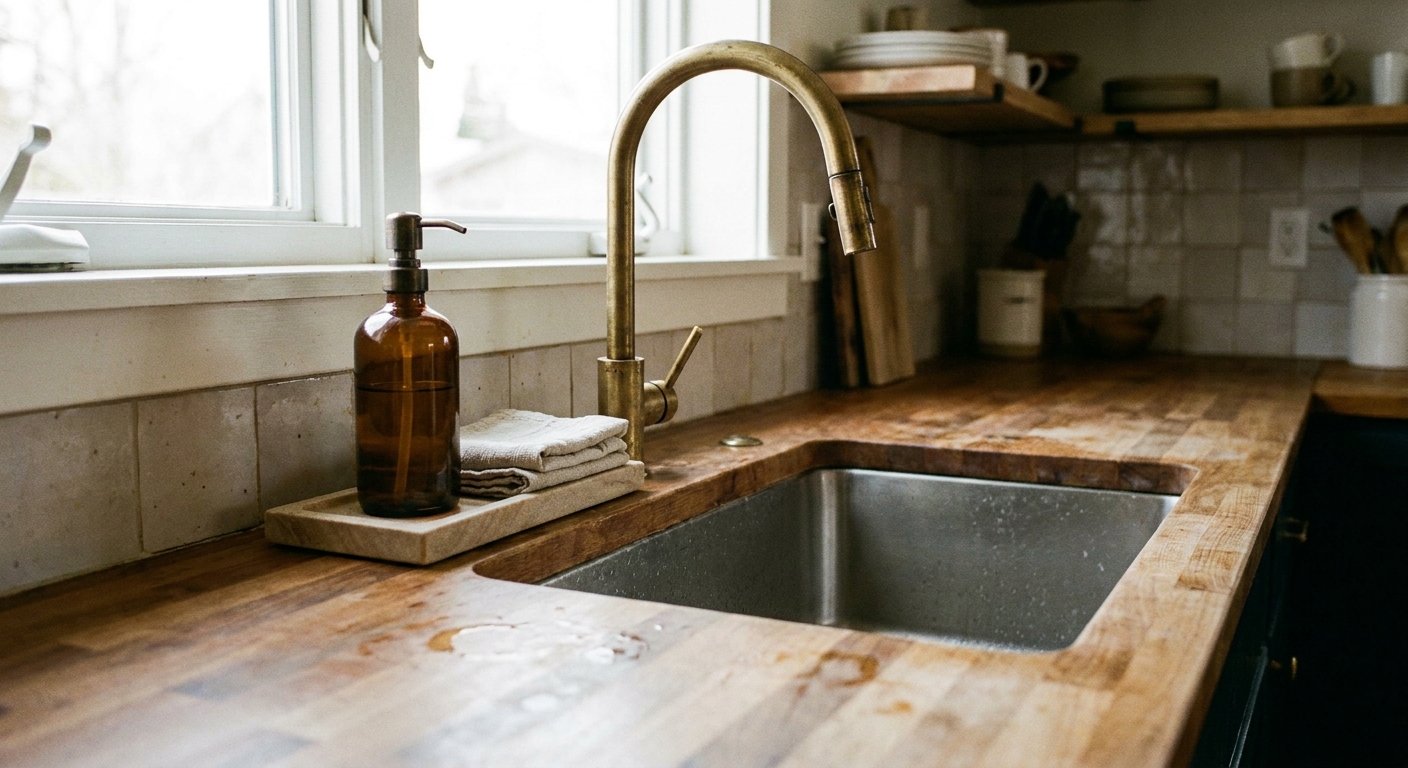
Wet zones need special rules
If butcher block ever fails, it usually starts at the sink. Not because wood is fragile, but because the same small strip gets splashed and ignored every single day.
Protect the sink cutout
- Dry the rim daily: make it part of your dish routine, like wiping the faucet.
- Use a small tray or towel for wet items: sponges, bottle brushes, and soap drips should live on something washable.
- Check caulk lines and seams: if you see gaps where the wood meets the sink or backsplash, reseal promptly. Water loves a tiny opening.
- Condition more often near the sink: that area can get an extra light oiling between full coats.
Undermount vs drop-in sinks
Undermount sinks put the cut edge front and center, so keeping that edge sealed or well-oiled (and keeping caulk intact) matters. Drop-in sinks protect the cutout more, but water can still creep under the rim if caulk fails. Either way, your best defense is drying the area and fixing gaps early.
Dishwasher steam
Some dishwashers vent steam toward the countertop edge when you crack the door open after a cycle. If you notice one corner drying out or roughening, add a little extra oil there and check your dishwasher manual for venting guidance.
Heat and knives
Butcher block is tough, but it is not a superhero. Heat shock and heavy blade work are the fastest way to turn “charming patina” into “why does this feel fuzzy?”
- Always use trivets: hot pans can scorch or rapidly dry the surface, which contributes to checking and cracking over time.
- Use a cutting board for most prep: you can slice occasionally on a true butcher block, but repeated chopping in one spot creates gouges that hold moisture and food particles.
- Rotate your prep spot: spread the wear so the wood ages evenly.
If you do get a burn mark, treat it like a localized repair: sand it out carefully and re-oil. Unlike laminate, you can actually come back from mistakes on real wood.
Fix scratches and stains
This is my favorite part of owning wood counters. They are renewable. Small damage is not a tragedy, it is a Saturday afternoon project.
For shallow scratches and rough grain
- Start with 180 to 220 grit sandpaper, sanding with the grain.
- Feather outward so you do not create a noticeable patch.
- Wipe away dust with a dry microfiber cloth, then a barely damp cloth, then dry again.
- Re-oil the area, and if needed, oil the whole top so the sheen matches.
For small gouges
- If the gouge has raised edges, lightly sand to level.
- For deeper dents, you can sometimes raise the fibers by placing a damp cloth over the spot and applying a warm iron briefly, then letting it dry fully before sanding. Go slowly and keep moisture minimal.
- Re-oil generously after sanding, because sanding opens the pores.
For water marks and dark rings
Many water marks are simply dryness around a splash zone. Try cleaning and re-oiling first. If a dark stain persists, a gentle sanding is usually the cleanest fix. Avoid chasing the stain aggressively in a tiny circle, because you can create a dip that catches light.
Prevent cracking and warping
Cracking happens when wood cycles between too wet and too dry, or when one side of the slab lives in a different climate than the other.
- Oil consistently: especially the end grain and edges, which lose moisture fastest.
- Wipe up water fast: no soaking mats, no puddles by the coffee station, no wet dish towels left overnight.
- Mind the underside: if you have an island top or a floating overhang, ask your installer whether the underside was sealed or oiled. Balanced moisture exchange helps reduce cupping.
- Keep indoor humidity reasonable: many homes do best around 35% to 55% relative humidity. In very dry winters, a small humidifier can help wood furniture and floors too.
- Do not trap moisture: rubber-backed mats can hold condensation against wood. If you love a runner on an island, lift and dry underneath regularly.
If your butcher block is cracking already, do not panic. Often the fix is a reset: clean, let it dry evenly for a few days, then begin regular conditioning. If cracks are wide or growing, a pro can evaluate whether movement joints, sink sealing, or installation issues are involved.
When to call a pro
- Persistent cupping or rocking: the top is visibly warped or changing quickly.
- Large or spreading cracks: especially near a sink cutout or seam.
- Soft, dark wood or a musty smell: signs water may be trapped below or around a sink rim.
- Finish failure on sealed tops: peeling, flaking, or widespread cloudiness usually means it is time to refinish, not oil.
A schedule you can stick to
Daily
- Wipe with mild soap and water as needed
- Dry thoroughly, especially around the sink
- Use a trivet under hot cookware
Weekly
- Check the sink rim, seams, and faucet splash zone for dullness or rough grain
- Do a quick refresh clean with vinegar solution if you like
Monthly (or when it looks thirsty)
- Oil the full surface, edges included
- Buff off excess so it feels dry, not slick
Seasonally
- Light sanding for rough areas and re-oil
- Reassess humidity if you notice new checking or gaps
Your butcher block does not need perfection. It just needs steady, gentle care. The payoff is a kitchen that feels warm under your palms, glows in the evening light, and gets better with every meal you make on it.
Quick FAQ
Can I put hot pans on butcher block?
I would not. Use a trivet. Heat can scorch and also dry wood rapidly in one spot, which encourages cracking.
Can I use disinfecting wipes?
Occasionally is usually fine, but many wipes leave residues and can be harsh with repeated use. If you use them, follow with a damp cloth and then dry thoroughly.
Why does my counter feel rough after cleaning?
That is raised grain from too much water or leaving the surface damp. Let it dry completely, then do a light sanding with 220 grit and re-oil.
Should I oil a butcher block that is sealed with polyurethane?
No. Oil cannot penetrate a film finish. For sealed tops, maintain the finish itself and follow the manufacturer’s care instructions. If the seal fails, you will want to refinish rather than trying to “feed” the wood from the top.