Burst Sofa Seam? Hand-Stitch It Before It Spreads
Clara Townsend
Clara Townsend is an interior stylist, vintage furniture enthusiast, and the creative voice behind Velvet Abode. With over a decade of experience transforming both cramped city apartments and sprawling fixer-uppers, she believes that a beautiful home is built on personal stories rather than massive budgets. When she isn't hunting for the perfect brass sconce at a local flea market, she can usually be found rearranging her living room for the third time this month.
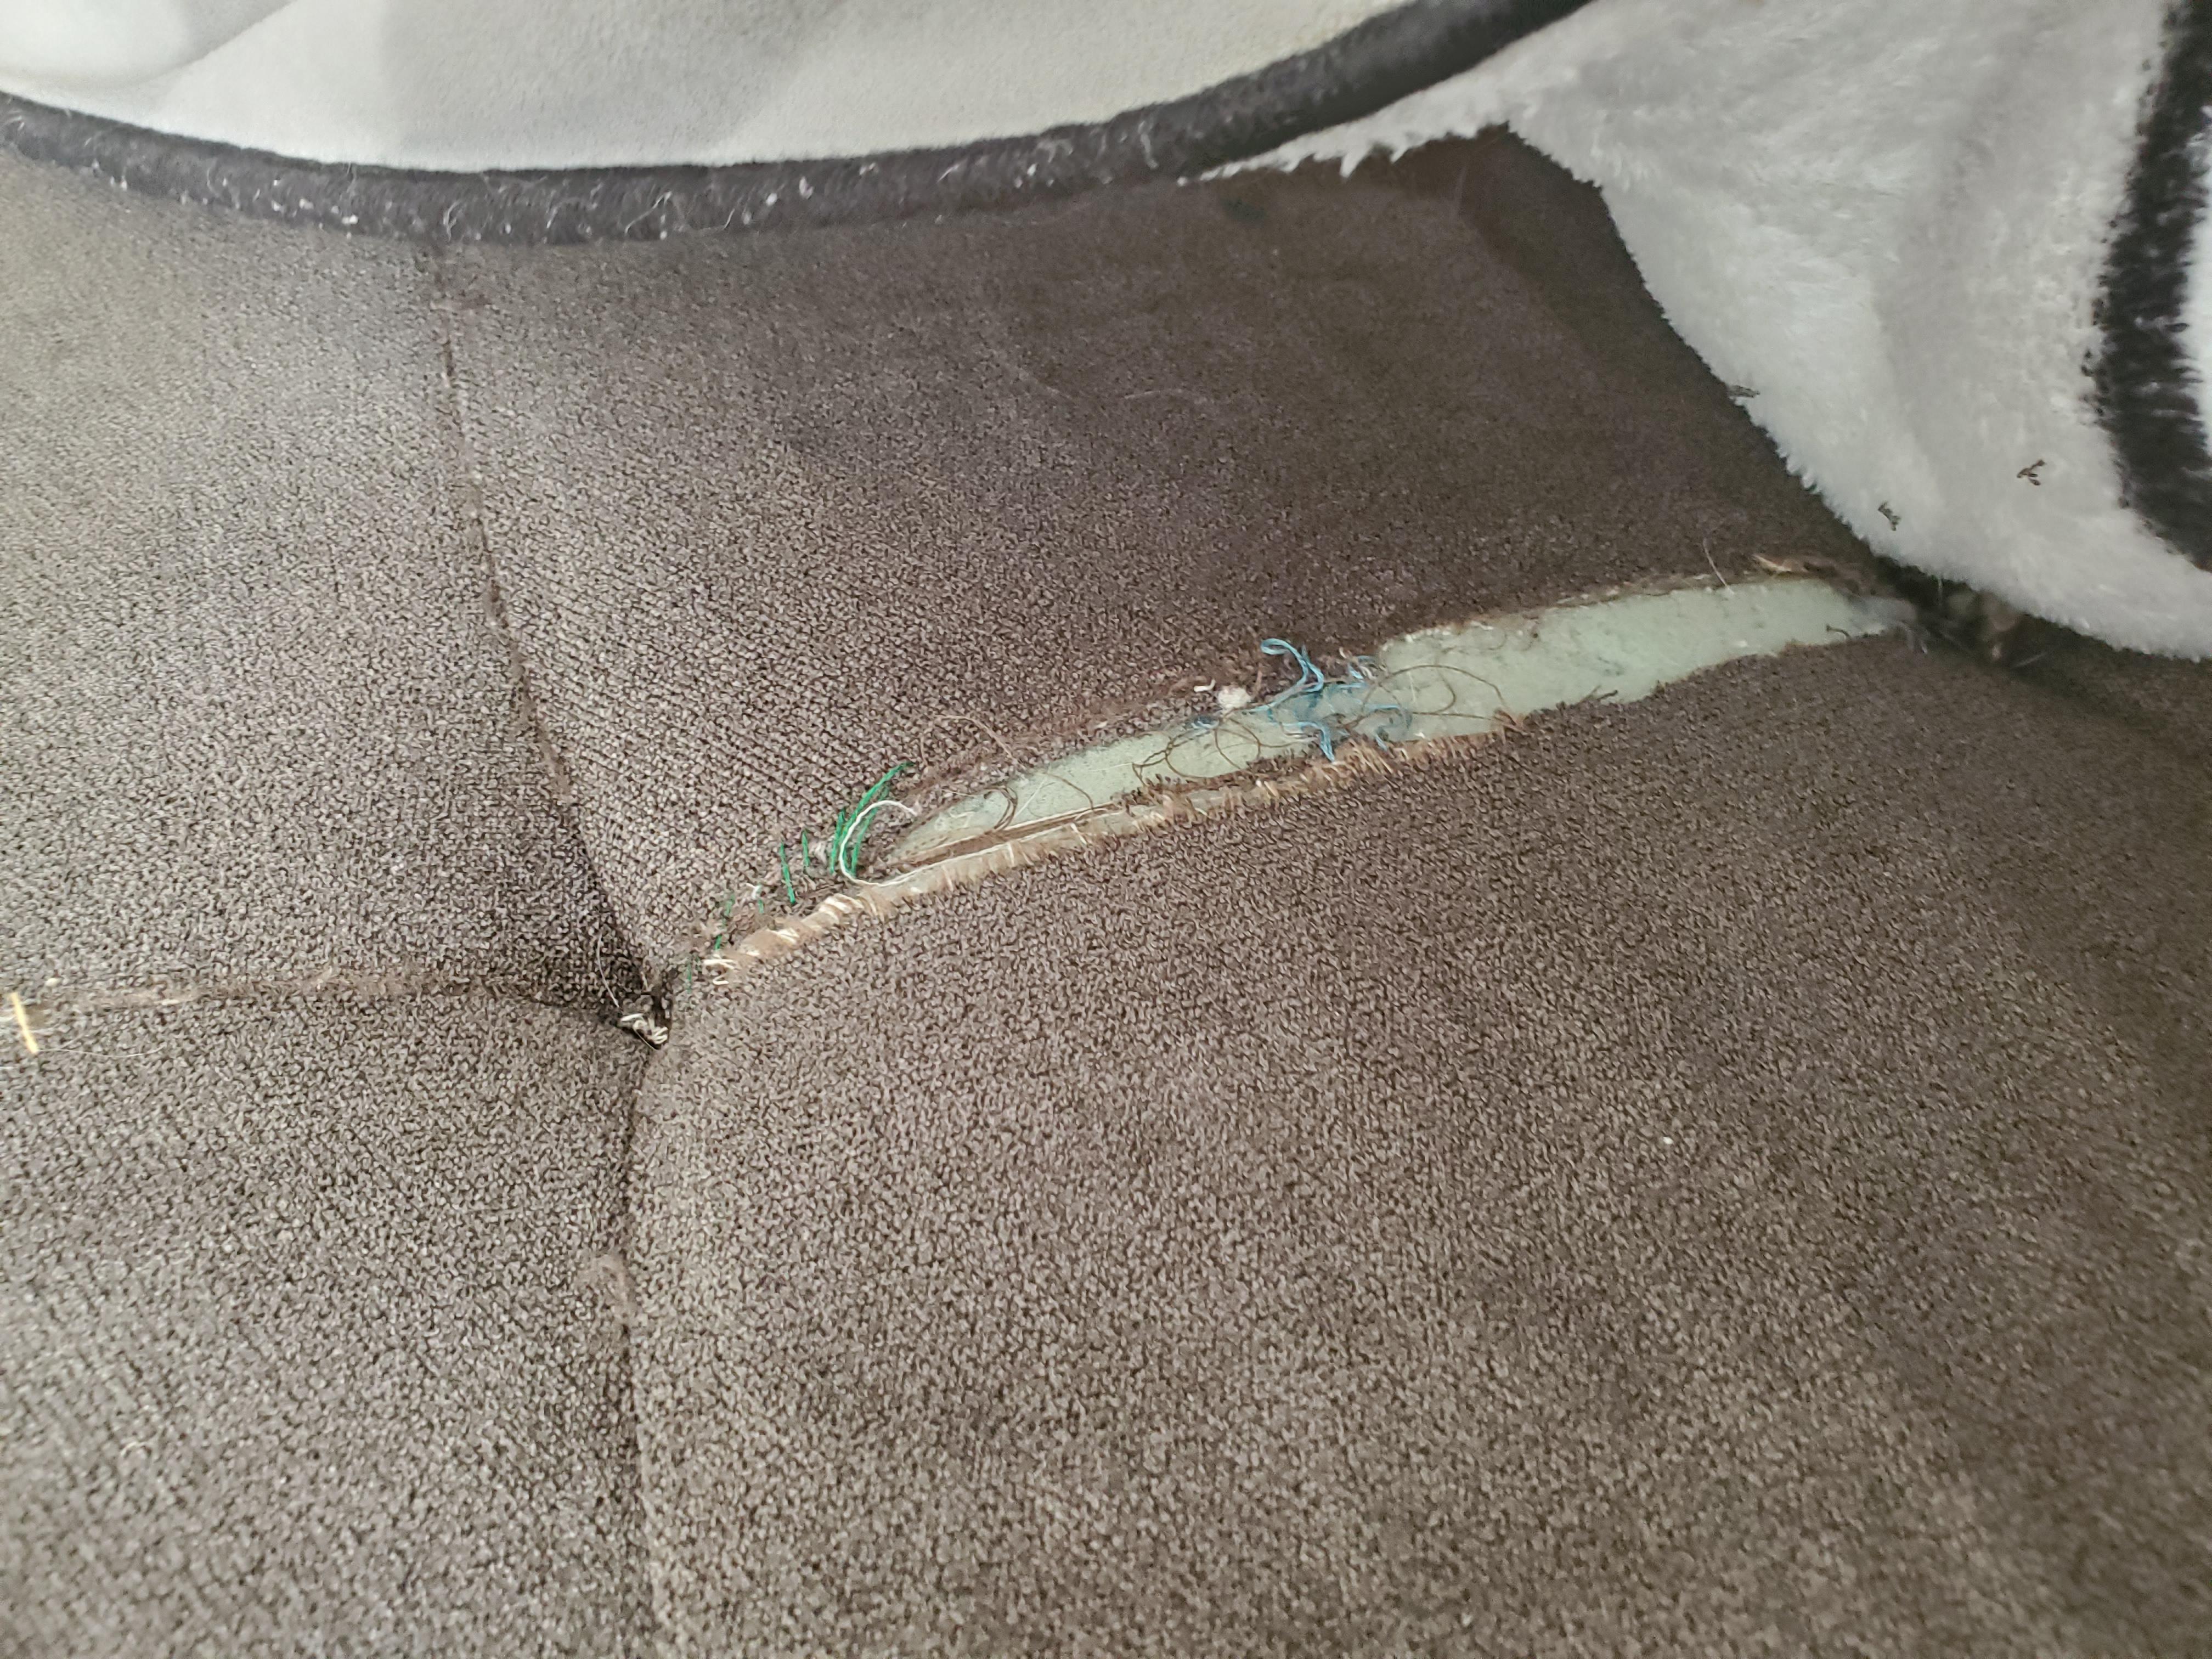
A seam that has “burst” on a sofa cushion looks dramatic, but it is often one of the friendlier upholstery problems to fix at home. The fabric is not missing, the edges are already meant to meet, and a careful hand-stitch can stop that opening from creeping wider every time someone sits down.
The goal here is not to patch the fabric like you would with a hole or rip. The goal is to reunite the seam allowance, reinforce the weak spot, and keep the repair flexible so it moves with the cushion instead of fighting it.
Quick checkpoint before you start: If the seam allowances inside the opening are still intact (not shredded, powdery, or fraying badly), this is a great DIY repair. If the fabric next to the seam is thinning or splitting, jump to When to call a pro and consider reinforcement options.
Material note: Leather, faux leather, and vinyl need different methods than woven cushion covers. Also, do not put an iron on any unknown fabric without testing first on a hidden seam allowance.
Seam opening vs. tear
If the stitching line has failed but the fabric itself is intact, you are dealing with a seam separation. That calls for stitches that pull two folded edges back together cleanly.
A full tear means the fabric fibers have broken. That is when patches, underlays, visible mending, or professional upholstery techniques tend to be the better path.
Quick check
- Seam opening: you can see the seam allowances inside, and both sides still have intact fabric right up to the edge.
- Tear near a seam: one side looks jagged or thinned, or you can see the fabric itself “laddering” beyond the stitch line.
If you have a seam opening with fabric that still feels strong, you can usually hand-stitch it confidently.
What you need
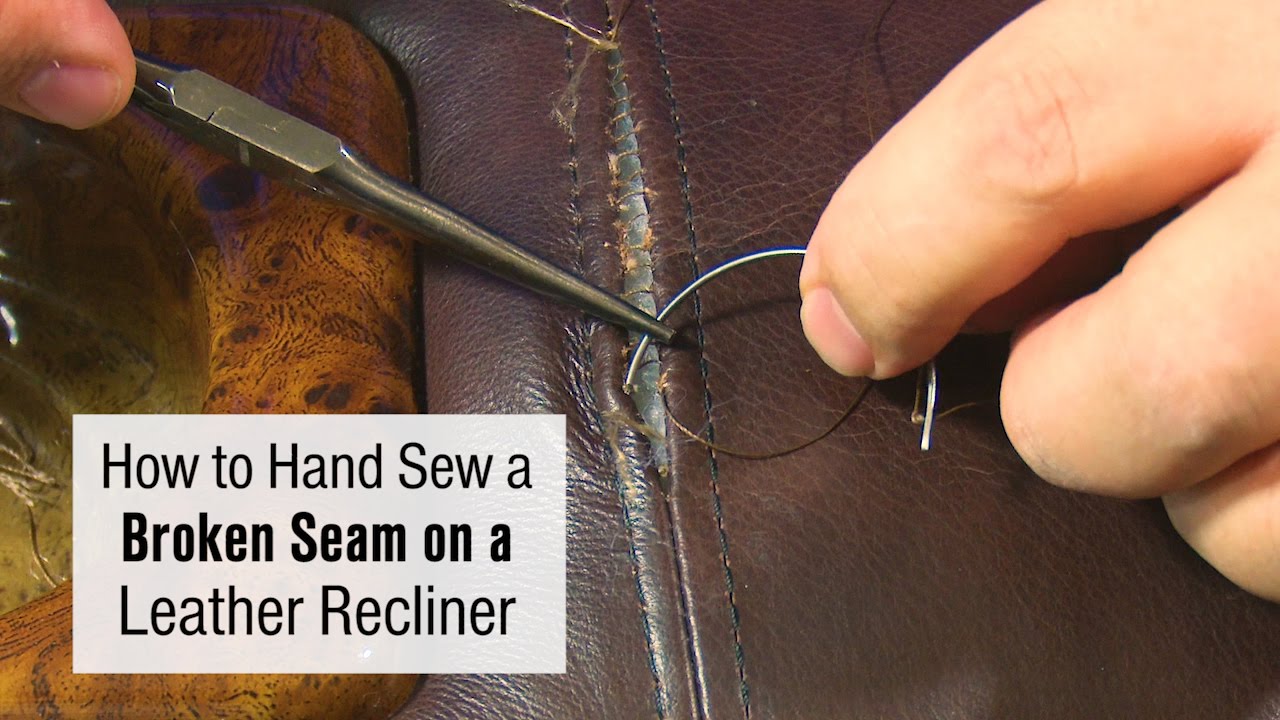
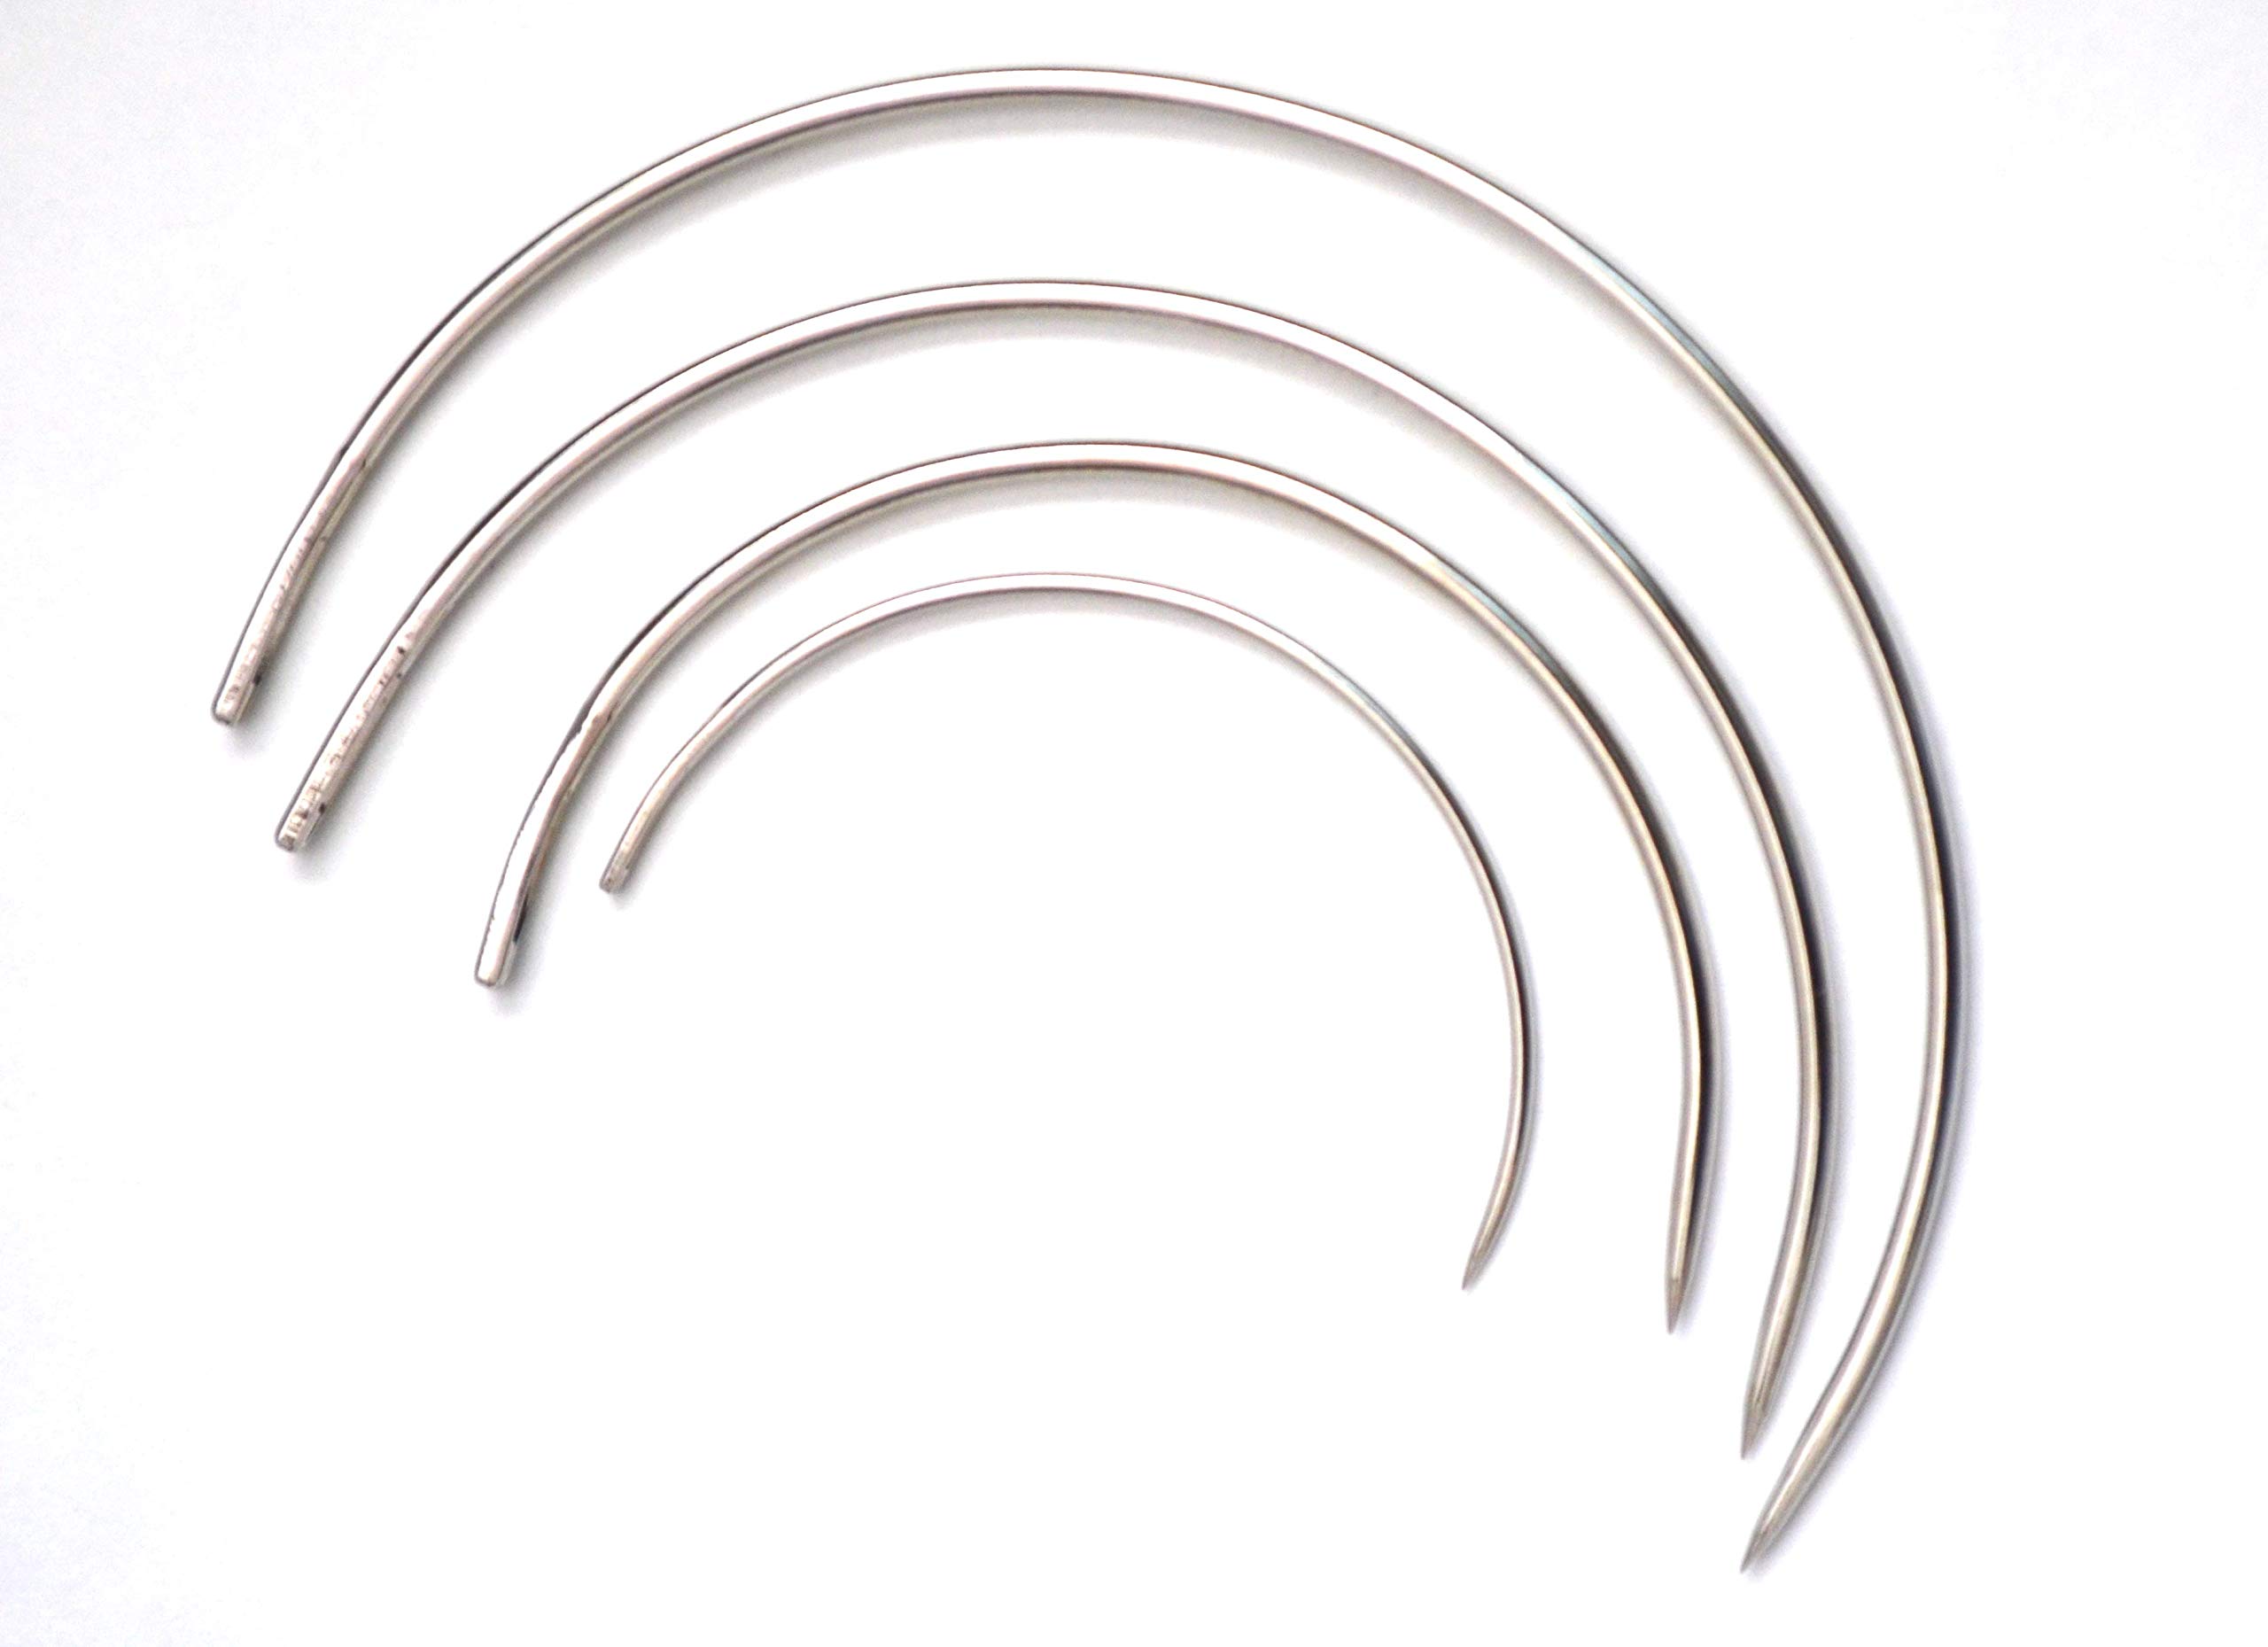
- Needle: a curved upholstery needle is easiest inside tight seams, but a sharp hand-sewing needle can work if you can access the area.
- Thread: heavy-duty polyester thread or upholstery thread. Avoid standard all-purpose cotton thread for high-stress cushion seams since it can abrade and snap over time. If you have upholstery-grade cotton-wrapped poly, that is a great option too.
- Small scissors or thread snips.
- Clips or pins: clips are safer for delicate fabrics and easier on fingers.
- Thimble (strongly recommended for thick seams).
- Seam ripper (optional, for cleaning up broken stitches neatly).
- Fusible seam tape or lightweight fusible interfacing (optional reinforcement, only when appropriate).
- Iron (only if you use fusible reinforcement and the fabric can tolerate heat).
Good pairing tip: heavier thread usually needs a needle with a larger eye and a sturdier shaft. If you are forcing the thread through the needle, size up.
Match thread to disappear
I know matching thread sounds fussy, but it is the difference between “I fixed it” and “why is there a tiny zipper line on my cushion?”
Thread matching tips
- Match value first: get the lightness or darkness right before obsessing over the exact color.
- Go slightly darker: on most woven upholstery, a shade darker blends better than a shade lighter.
- Use a blend when in doubt: heathered or slightly variegated thread can camouflage stitches on textured fabric.
- Test on the underside: take two or three stitches in a hidden area and look from standing height.
If your cushion has contrasting piping or welting, match the thread to the main fabric unless your stitches will land visibly on the piping itself.
Prep the seam
1) Unzip and remove the cover
If the cushion cover zips off, take it off. Working flat is calmer, more accurate, and less likely to create puckers. If it is a fixed cushion that cannot be removed, you can still do this, just go slowly and keep tension gentle.
2) Clean up loose threads
Snip any long, broken threads. If the old stitches are messy and bunched, carefully remove only the visibly failed section with a seam ripper. You do not need to unpick the whole cushion, just enough to create tidy edges.
3) Find the fold and the seam line
This is the part that makes your repair look “original.”
- Folded edge: the fabric fold where the raw edge is tucked inside. This fold is what you will stitch into so your thread stays hidden.
- Seam line: the original line of stitching that held the cushion together. If you can see old needle holes, that is your roadmap.
Fold the raw edges back inside so the seam line sits where it originally was. Clip every couple of inches so nothing shifts while you sew.
Little styling note: if the cushion has a strong nap (velvet, chenille) or a directional pattern, take a moment to ensure both sides are aligned before you commit. A seam repair can accidentally create a tiny twist that catches the light differently.
Ladder vs. blind stitch
Both stitches are great. The right choice depends on how accessible the seam is and how invisible you need the repair to be.
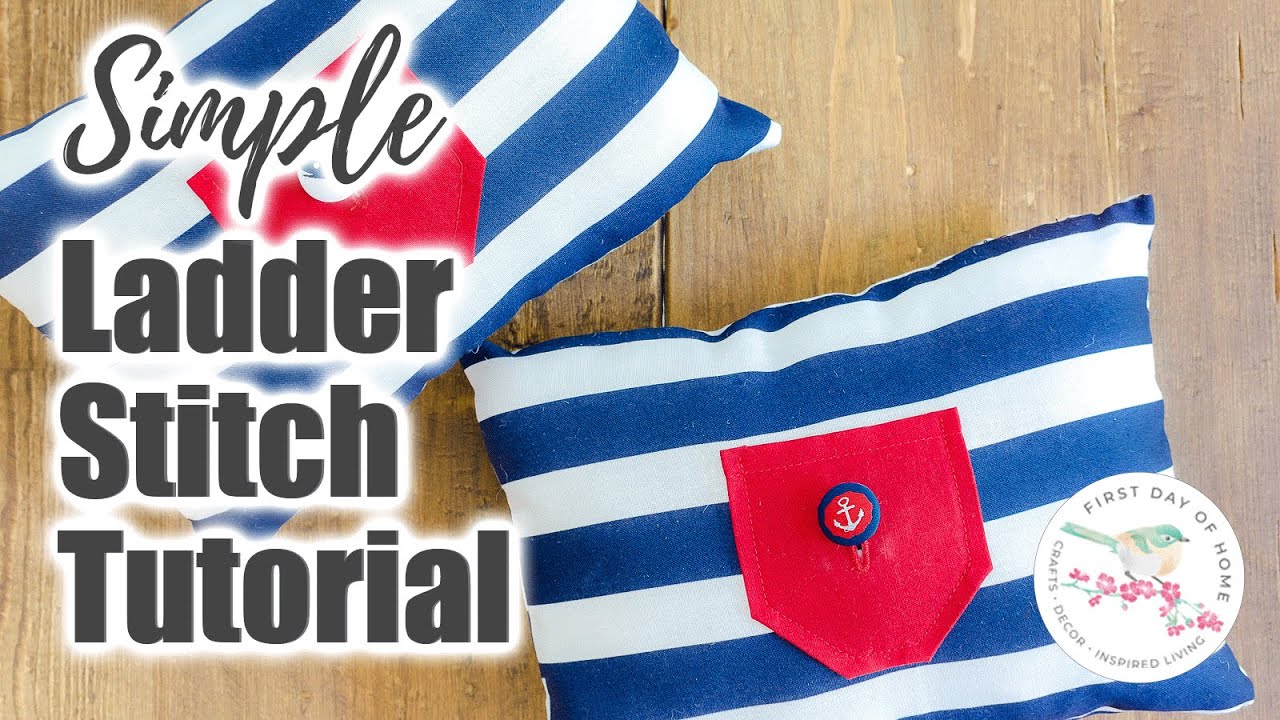
Ladder stitch (invisible stitch)
Best for: seams you can pinch closed, repairs you want to vanish, cushion openings where the seam edges fold inward neatly.
Why it works: the thread runs in a zigzag inside the fold, and when you gently pull it snug, the “ladder rungs” disappear.
Blind stitch (slip stitch)
Terminology varies, so if you have heard “slip stitch,” this is the same idea here.
Best for: slightly thicker fabrics, places where one seam allowance is easier to catch than the other, or when you want a bit more bite into the fabric.
Why it works: tiny angled bites grab the fold with minimal thread showing on the outside.
If you are unsure, choose ladder stitch for most cushion seams. It is forgiving and beautifully subtle.
How to sew a ladder stitch
Thread your needle and knot securely. Use a length of thread about the distance from your fingertips to your elbow. Longer thread tangles and frays, especially on textured upholstery.
Optional but helpful: upholstery thread can be a little slippery. A double knot (or a surgeon’s knot) helps. Thread wax can also calm tangles and abrasion if you have it.
Start from the inside. Hide the knot inside the seam allowance so it will not peek out later.
Take a small horizontal bite on one folded edge. Aim for about 1/8 inch to 1/4 inch (3 to 6 mm), staying just inside the fold so you are catching the seam allowance, not sewing through the outer face.
Cross to the other side and take an identical bite. You are building a little “ladder” of stitches between the folds.
Work in short sections, then tighten. Every 4 to 6 stitches, gently pull the thread until the seam closes. Do not yank. Think: snug enough to meet, loose enough to flex.
Backstitch to lock at the end. When you reach intact machine stitching, overlap by about 1 inch (2.5 cm), then take two tiny backstitches in place to secure.
Hide the tail. Run the needle into the seam, travel under the fabric for an inch, then exit and snip close so the tail retracts inside.
If your cushion has a tiny seam allowance: take smaller bites and consider adding a second line of stitches over the stressed area (see reinforcement). Minimal seam allowance is common, and it just means you need a lighter touch and a little extra support.
How to sew a blind stitch
If the seam is bulky or you want slightly more grip, try a blind stitch (also called a slip stitch).
Hide your knot inside the seam allowance.
Take a tiny bite from the folded edge on side A. Keep it small so it will not show on the outside surface.
Angle across and take a tiny bite on side B. Your thread should run mostly inside the seam, not across the outside like a visible whip stitch.
Repeat, keeping stitches even. About 1/8 inch to 1/4 inch spacing works well for most upholstery.
Secure with a couple of backstitches at the end and bury the tail as described above.
Reinforcement options
Sometimes a seam bursts because the original stitching was stressed in one spot. Reinforcement can help, but the key is choosing the kind that does not make the area stiff or shiny.
Option A: double-stitch the weak zone
This is my favorite low-risk reinforcement. After you close the seam, run a second line of hand stitches over the central 2 to 4 inches (5 to 10 cm) of the repaired section, especially if that spot sits right at the front edge where people perch.
Option B: fusible seam tape (test first)
Best for: medium to heavier woven upholstery fabrics where the seam allowance can tolerate a touch of heat, and you have room to work neatly.
Skip it if: the fabric is velvet or chenille (pile crush risk), leather or faux leather, or anything that tends to get shiny or watermark from heat and pressure.
If you use fusible tape, apply it to the inside seam allowance only, and press with a press cloth and low heat. Always test on a hidden seam allowance first. Your goal is support, not a crunchy ridge you can feel through the cushion or adhesive that telegraphs to the right side.
Option C: internal fabric bridge
For a seam allowance that is fraying, you can hand-tack a narrow strip of lightweight cotton, twill tape, or lining fabric inside the seam allowances, like a tiny bridge. This gives your stitches something stable to grab without changing the look from the outside.
Option D: decision guide for fraying seams
- Light fraying only: stitch it closed, then double-stitch the area.
- Noticeable fraying or thinning: add an internal fabric bridge, then stitch.
- Shredded seam allowance or fabric breaking beyond the seam line: hand stitching alone usually will not hold. That is pro territory, or a rebuild with new panels.
Why patches are usually wrong
If you patch over a seam opening from the outside, a few things happen:
- The patch edge can catch on clothing and start lifting.
- The area becomes stiff, which concentrates stress right next to the patch.
- It is visually obvious, especially on smooth fabrics.
Patches shine when fabric is missing or torn. When a seam has simply come undone, your best repair is almost always clean closure plus reinforcement.
Troubleshooting
My seam looks puckered
- Your stitches are too tight. Re-sew with gentler tension.
- Your stitch spacing is uneven. Smaller, consistent bites help.
- The cover is being pulled while you sew. Clip more often and work flat if possible.
The seam keeps reopening
- The thread may be too weak. Switch to upholstery thread or heavy-duty polyester (or cotton-wrapped poly).
- The fabric may be thinning right next to the seam. Add a subtle internal reinforcement, or consider a pro repair.
- The cushion insert may be overstuffed for the cover. This is very common with replacement inserts.
I can still see the stitches
- Move your bites closer to the fold so the thread stays inside.
- Try a finer needle and slightly finer thread, but keep it strong enough for upholstery.
- Match thread value more closely.
When to call a pro
I am all for empowering DIY repairs, but there is a point where the fabric is telling you it is under too much strain.
Call an upholsterer if you notice
- Shredding seam allowances or fabric that feels brittle and thin next to the seam.
- Repeated seam failure in the same spot even after a careful repair.
- Cracking, peeling, or splitting on leather or faux leather cushions.
- Pattern matching issues you care deeply about (plaids, stripes, strong geometrics) and the seam sits in a very visible place.
- Structural issues like a sagging seat deck, broken springs, or foam that no longer supports weight. Those problems force seams to do a job they were never meant to do.
A good pro can restitch with industrial tension, add internal support, and in some cases rebuild the cushion so the cover is not under constant strain.
Aftercare
- Let the seam rest for a day before heavy use if you can, especially if you reinforced with any fusible product.
- Rotate and flip cushions weekly to spread wear more evenly.
- Check insert size: if the cover feels drum-tight, consider a slightly smaller insert or one with softer fill to reduce seam stress.
- Address the perch spot: if everyone sits on the same front corner, add a favorite throw or lumbar pillow there. It sounds silly, but it redirects pressure in a very real way.
Confidence before you start
If you can hem a pair of pants or sew on a button, you can do this. The secret is slow stitching, gentle tension, and stopping the moment you feel yourself rushing. Your sofa does not need perfection. It just needs the seam to be supported so it can keep holding your life, movie nights, naps, and all.