Broken Mini Blinds in a Rental
Clara Townsend
Clara Townsend is an interior stylist, vintage furniture enthusiast, and the creative voice behind Velvet Abode. With over a decade of experience transforming both cramped city apartments and sprawling fixer-uppers, she believes that a beautiful home is built on personal stories rather than massive budgets. When she isn't hunting for the perfect brass sconce at a local flea market, she can usually be found rearranging her living room for the third time this month.
Mini blinds have one job, and yet they manage to break in the most theatrical ways: a tilt that suddenly does nothing, a cord that turns into a scary loop, or one sad slat that kinks like it has given up on life. The good news is that most apartment mini blind problems are small, fixable, and very low-risk for your security deposit as long as you avoid drilling into the window frame or mangling the headrail.
Below are renter-friendly fixes you can do with basic tools, a little patience, and the gentle confidence of someone who has absolutely re-threaded a blind cord at midnight before guests arrived.
Quick safety and permission check
Before you start, two small guardrails that save a lot of regret:
- Stop if you see frayed or snapped cords: That is a maintenance call. Frayed cord is both a safety issue and a “this will get worse the moment I tug it” issue.
- Avoid permanent changes unless allowed: If you did not install the blinds, skip cutting cords or replacing internal parts unless your lease or landlord OKs it. Temporary safety hardware is usually the sweet spot.
- Adhesives are not magic: Removable hooks and strips can fail on dusty metal, textured walls, humid bathrooms, or sun-baked paint. Test on a small, inconspicuous spot first and remove slowly to reduce paint pull-off.
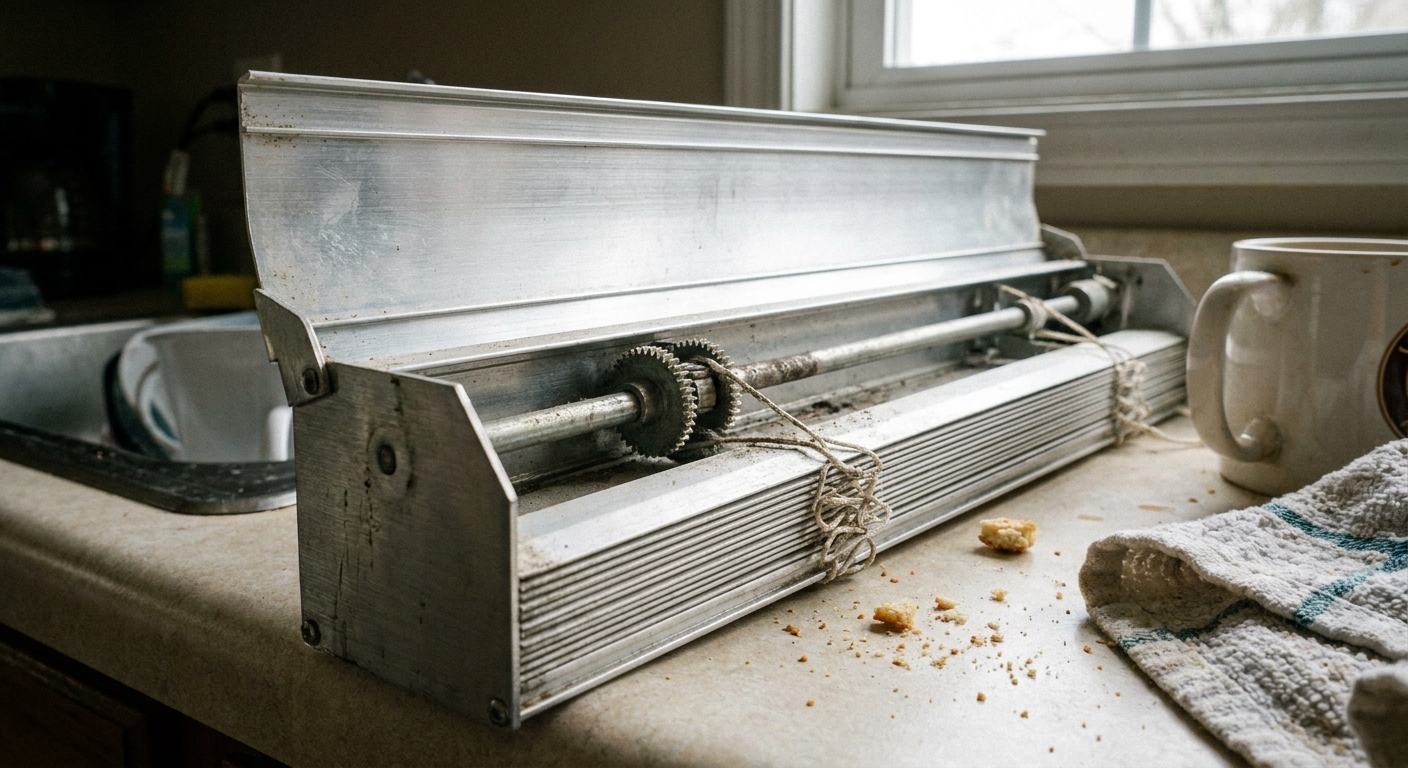
First: figure out what you have
Before you touch anything, identify the control style. Many mini blinds fall into the two camps below, but there are common variants (cordless lift, motorized, and some clutch or continuous-loop systems). The fix depends on what you have.
Wand tilt (plus lift cords)
- Signs: A clear plastic wand on one side that you twist to tilt slats. Lift cords usually sit beside it.
- Common failures: Wand spins but slats do not move, wand hook pops off, internal tilt gear strips.
Cord tilt (tilt cords plus lift cords)
- Signs: No wand. You tilt with cords (often a pair you pull alternately) and lift with another cord set.
- Common failures: Tilt cords tangled, ladder strings twisted, cord lock jammed, cord loop too long.
Cordless or motorized
- Signs: No dangling lift cords, or a battery wand/button, or a hidden spring tension system. You lift by pushing or pulling the bottom rail, or by motor controls.
- Reality check: If a cordless blind will not stay up, drops on its own, or feels “dead,” it is often a spring or internal mechanism issue. That is usually a landlord or manufacturer fix, not a midnight DIY moment.
Renter tip: Take two quick photos before you start. One of the full blind, and one of the headrail from the side. If you need to put everything back exactly as found, your camera roll becomes your instruction manual.

Fast decision guide
- Tilt problem: slats will not rotate, rotate unevenly, or the wand spins freely. Go to Fixing tilt.
- Lift problem: blind will not raise, will not lower, or will not release. Go to Lift cords and cord lock.
- Slat problem: one slat is bent, kinked, or missing. Go to One slat or Straighten slats.
- Cord loop problem: long loop or dangling cords. Go to Cord safety today.
Quick triage: what is actually broken?
Use this fast check so you do not accidentally create a bigger problem while hunting the smaller one.
- Slats tilt unevenly or not at all: Often a ladder-string twist or a tilt mechanism issue.
- Blinds will not raise or lower: Usually the cord lock is jammed or the lift cords are tangled.
- One slat is bent or kinked: Usually fixable by flattening, or by replacing a single slat.
- Cords form a long loop: Safety issue. Shorten or secure immediately, especially with kids or pets.
Fixing tilt (wand and cord)
1) Slats are tilted but stuck
Sometimes nothing is “broken.” The ladder strings can twist, especially after someone yanks the lift cords while the slats are fully closed.
- Lower the blind fully so the stack is not compressed.
- Open the slats to a neutral, half-open position.
- Gently pull down on the bottom rail and wiggle it side to side a few millimeters to help the ladders settle.
- Try tilting again slowly.
If the tilt suddenly works, you likely had a ladder twist, not a mechanical failure.
2) Wand tilt: wand spins but slats do not move
This is usually one of two things: the wand hook disconnected, or the internal tilt “tilter” stripped.
- Check the wand connection: At the top of the wand there is typically a small hook that clips into a plastic sleeve. If it has popped loose, you can usually re-hook it without opening the headrail.
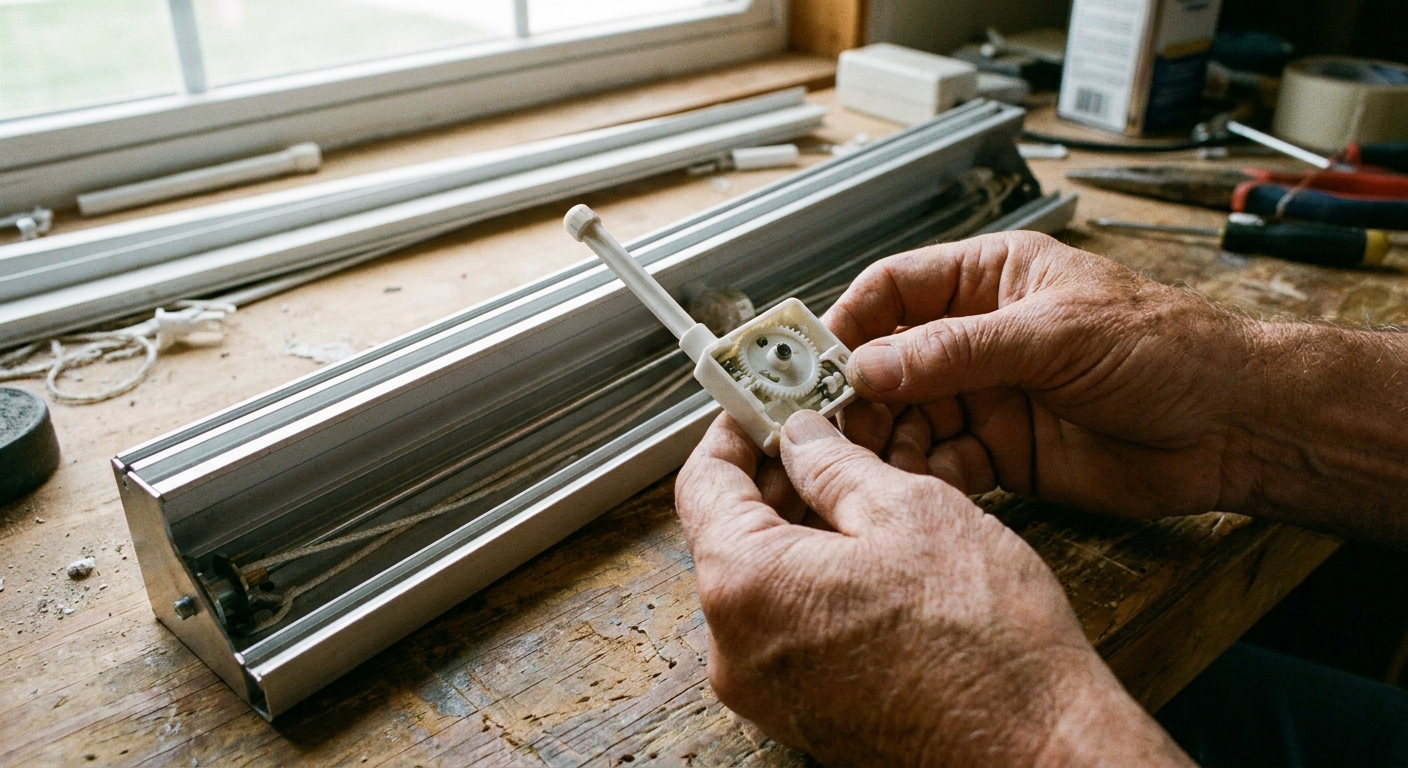
- If it is connected but still free-spins: The tilter inside the headrail may be stripped. This is a common, replaceable part, but only proceed if you are comfortable opening the headrail and can put everything back neatly.
Stop and call maintenance if: the headrail is bent, the mount feels loose, or you see cracked plastic around the tilter area. That is the point where “small fix” becomes “oops, now it is worse.”
How to replace a tilter without chewing up the headrail:
- Remove the valance (if you have one) by gently pulling it forward or releasing clips.
- Check the ends first. Some headrails have end caps or hidden clips you need to loosen before the cover will move.
- Open the headrail cover. Many covers snap up from the front edge, but some slide. Use a flat screwdriver wrapped in a thin cloth to avoid scratching.
- Locate the tilter near the wand side. It is a small plastic gear housing the wand connects to.
- Take a photo of how the tilt rod and strings sit.
- Slide the old tilter out and slide in the matching replacement.
- Snap or slide the cover back on firmly, then test tilt before you reinstall the valance.
How to match the replacement tilter (so you do not buy three wrong ones):
- Headrail size: measure the width and note the style (standard 1-inch mini blind headrails are common, but not universal).
- Tilt rod shape: look for a hex or round rod (and the size). The tilter must match that rod profile.
- Side: note whether the wand is on the left or right. Many tilters are side-specific.
- Bring the old part: if you can remove it cleanly, bring it to the hardware store. It is the fastest way to get an exact match.
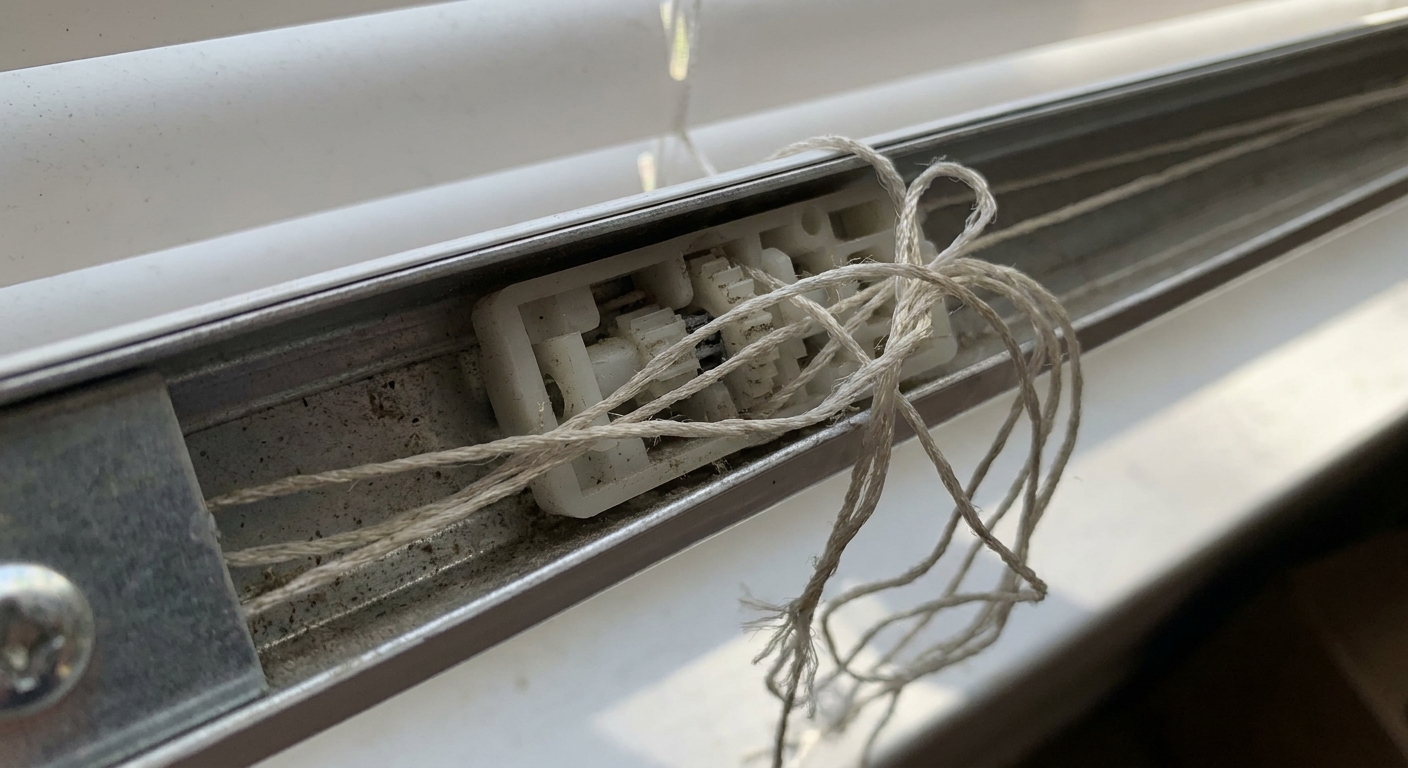
3) Cord tilt: cords pull but slats barely move
Cord-tilt systems are prone to tangles near the top, especially if the cords were yanked at an angle.
- Lower the blind fully.
- Gently pull each tilt cord straight down, one at a time, to see if one is snagged.
- If cords feel stuck, open the headrail cover (only if you are comfortable) and look for a cord that jumped out of its guide wheel.
- Use a toothpick or small flat tool to nudge the cord back into the wheel track. Do not cut anything.
Stop and call maintenance if: you see fraying near the mechanism, a hard knot that will not pass through, or cracked plastic wheels.
Lift cords and cord lock
If your blind will not raise, the issue is often the cord lock, which is that little block inside the headrail that grips the lift cords.
Unjamming the cord lock
- Pull the lift cords slightly toward the center of the blind (not straight down). This is the “release” direction on many cord locks.
- While holding that angle, tug down gently to see if the lock frees.
- If it is still stuck, lower the blind fully and open the headrail cover (only if you are comfortable).
- Check for crossed cords or a cord that slipped behind the lock.
- Untangle gently. If you see a wad of cord, do not yank. Work the loops loose bit by bit.
Stop and call maintenance if: a cord is worn through, snapped, or pulled up into the headrail, or the cord lock plastic is cracked. Those parts can be replaced, but it is easy to create more damage while forcing it.
One slat (yes, just one)
One bent slat can make the whole window look messy, especially when sunlight hits the crease and highlights it like a neon sign. You can replace a single slat if you can source a match.
Find a matching slat
- Best option: Ask your landlord or maintenance if they have spare slats or a donor blind. Many do.
- DIY option: Bring one slat to a hardware store to match width and color. Common sizes are 1-inch and 2-inch.
- Sneaky renter option: If the bend is near eye level, swap in a slat from the very bottom temporarily, then place the damaged one at the bottom.
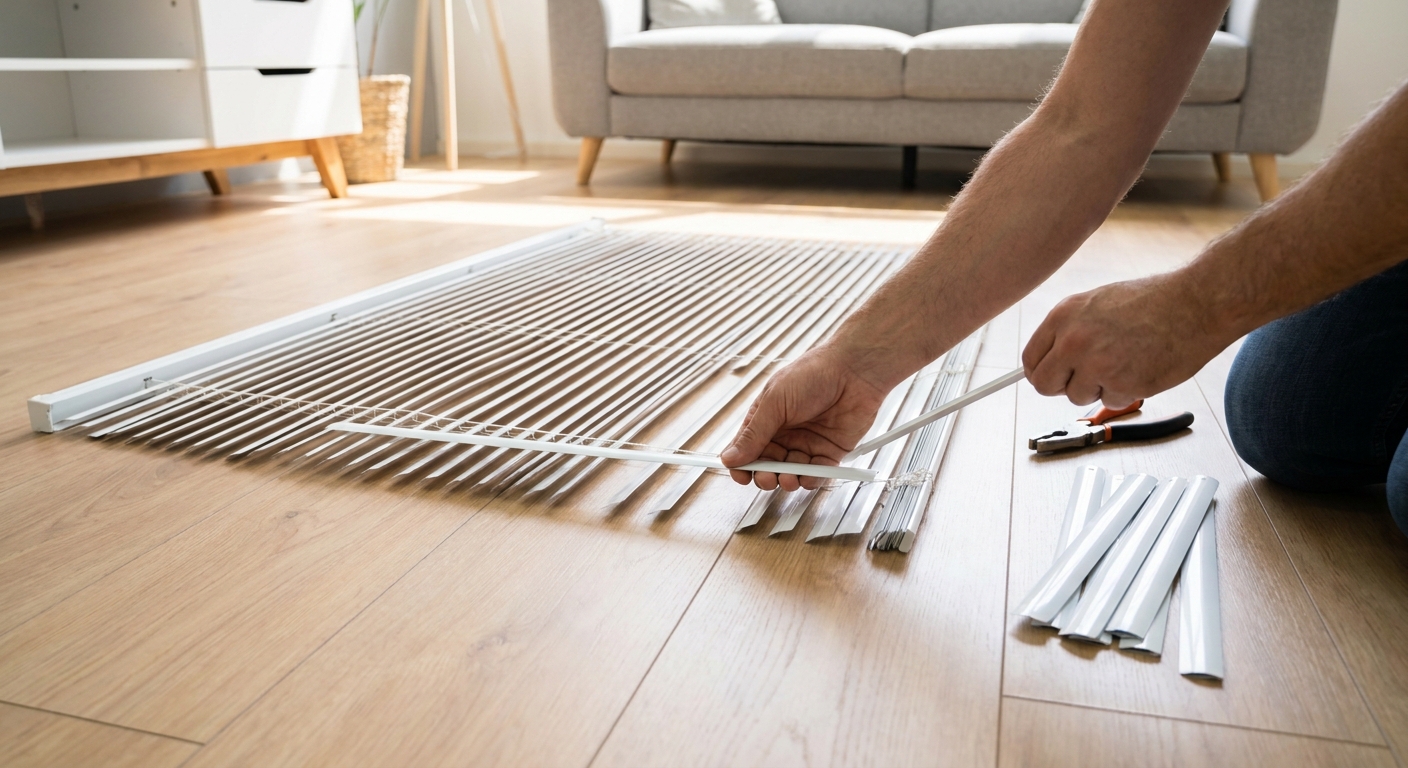
How to replace the slat
Mini blinds are threaded like a little ladder: the slats sit on ladder strings, and lift cords run through holes near each side.
- Lower the blind fully and tilt the slats open so you can access them.
- At the very bottom rail, look for plastic plugs covering the lift-cord knots. Pop the plugs out gently.
- Untie or loosen the lift-cord knots just enough that you can pull the cords up and out of the damaged slat’s holes.
- Slide the damaged slat out sideways from the ladder strings.
- Slide the replacement slat into the same ladder rung position.
- Re-thread the lift cords down through the holes and re-tie the knots snugly.
- Push the plastic plugs back into the bottom rail.
Keep it tidy: Work on a towel on the floor so you do not scratch the slats or lose tiny plugs.
Straighten bent slats
If the slat is creased like a folded piece of paper, replacement is usually the cleanest fix. But if it is simply bowed or lightly kinked, you can often rehab it.
Gentle flattening
- Lower the blind and tilt slats open.
- Remove the bent slat if possible, or isolate it by tilting for access.
- Place the slat on a flat surface with a soft cloth underneath.
- Use your palm to press along the bend. Work slowly from the center outward.
- For stubborn curves, sandwich the slat between two towels and press with a flat book for a few hours.
Avoid: heat tools and heavy clamps. Heat can warp vinyl, and clamps can leave permanent bite marks that look worse than the original bend.
Wand replacement
If the tilt works but the wand itself cracked, snapped, or is missing, this is one of the easiest wins.
- Match the hook style at the top (S-hook vs. enclosed clip style varies).
- Match the length so it hangs within comfortable reach but does not drag.
- Most wands unhook at the top and swap in without opening the headrail.
Ladder string issues
If slats keep tilting unevenly and you see a ladder string (the vertical “rails” that hold the slats) has snapped, the blind can get crooked fast.
Renter reality: Re-laddering a blind is doable, but it is fiddly and easy to make messier than it started. If the blind is landlord-provided, this is usually a maintenance replacement situation.
What you can do now: Lower the blind, open the slats halfway, and avoid forcing the tilt. If a slat is about to fall out, remove that one slat temporarily and set it aside so it does not bend into modern art.
Cord safety
Long cord loops are not just annoying. They are a real safety hazard for children and pets. Many newer designs reduce this risk, but rentals often have older hardware.
Important note: If you are not comfortable modifying cords, use a temporary safety solution below and ask maintenance for a cord-safe update.
Option A: temporary, no-cut safety
- Use a cord cleat: A small plastic cleat can be attached with removable adhesive strips to the wall beside the window, then you wrap cords up and out of reach.
- Use cord wind-ups: Small devices that wind excess cord and clip to the cord itself.
- Use a removable hook high up: An adhesive hook placed high can hold the loop up, away from reach. Test first and do not rely on it in hot, humid, or dusty spots.
These options avoid cutting and are easy to remove cleanly later.
Option B: shorten the cord (only if allowed)
Many mini blinds use separate lift cords; some use continuous-loop or clutch systems. If you have a true continuous loop, do not cut unless you are sure it is designed to be resized. If your cords end in accessible knots (often inside the bottom rail under plugs), shortening from the bottom is usually the cleanest approach.
- Locate where the cord ends are knotted (often inside the bottom rail under plugs).
- Decide how much slack you need for normal use.
- Re-tie the knot higher up and trim only the excess cord end beyond the knot.
- If the cord is synthetic, you can prevent fraying by wrapping the cut tip with a tiny piece of clear tape. Skip melting unless you truly know the material and technique.
My honest rental stance: If you did not install the blinds, do not permanently alter mechanisms you cannot easily reverse. Temporary safety hardware is usually the sweet spot.

No-drill blackout and privacy
Sometimes the blinds are “fixed” but still not doing what you need, especially if you work nights, live near a bright streetlight, or just want that cozy cave feeling on weekends. If your rental has a metal header or you are not allowed to drill, layering is your best friend.
No-drill options
- Tension rod + blackout curtain: Place a tension rod inside the window recess, then hang a blackout panel with grommets or clip rings. Choose a rod with rubber ends to protect paint.
- Blackout roller shade with adhesive brackets: Some renter-friendly shades use strong adhesive mounts. Clean the surface with rubbing alcohol first, follow cure times, and test adhesion where a failure will not rip paint or drop hardware onto the sill.
- Static cling blackout film: Great for bathrooms and bedrooms. It clings to glass, not the frame, and removes cleanly. It is also very “rental receipt” friendly.
- Removable rod hooks: If you have paintable wood or drywall around the window, you can use removable hooks to hold a lightweight rod. Avoid putting adhesive on dusty metal headers where it will fail.
- Blackout panel tucked behind the blind: In a pinch, you can cut a piece of blackout fabric and tuck it behind the headrail and down the glass. It is not glamorous, but it works for a short stretch.
Styling note from my homebody heart: If you are layering curtains over mini blinds, pick a fabric with texture like linen-look polyester or a softly brushed cotton. Even in a rental, that extra softness makes the whole room feel more finished.

Tools and parts
You do not need a full workshop. Think of this as a small, tidy toolkit that lives in a drawer.
- Flat screwdriver (wrap the tip with a thin cloth to prevent scratches)
- Needle-nose pliers (helpful for knots and small clips)
- Scissors
- Toothpick or skewer (for guiding cords back into place)
- Replacement parts: tilter, wand, wand hook, a few spare slats (if you can get them)
- Removable adhesive strips or hooks (for cord safety and no-drill layering)
Bracket and alignment check
If the whole blind looks crooked, or the bottom rail keeps slamming into one side, the issue might be simpler than cords and gears.
- Look at both ends of the headrail and confirm it is fully seated in the mounting brackets.
- Check that end caps are snapped in and not pinching the tilt rod or cords.
- If a bracket is loose, do not crank on screws in a rental window frame. Take a photo and ask maintenance to snug it properly.
When to call the landlord
Some issues are simply wear-and-tear, and most landlords would rather swap a blind than have a tenant wrestle with a snapped cord inside a headrail.
Call maintenance if:
- The lift cord is frayed, snapped, or pulled up into the headrail.
- The headrail is bent or the mounting brackets are loose.
- The cord lock is cracked.
- You suspect the blind is an older cord design and you want a safer update.
- You have a cordless blind that will not hold position or feels broken internally.
What to send
- One photo of the full blind.
- One close-up photo of the problem area.
- A one-sentence description: “Tilt wand spins freely and slats do not move,” or “Lift cords will not release from cord lock.”
This speeds things up and makes you look like the kind of tenant everyone quietly hopes for.
Finishing touches
If you have done the fix but the blind still looks slightly uneven, these soft styling moves help without drawing attention to the hardware.
- Hang curtains wider than the window so the stack covers the blind edges.
- Add a simple tension rod cafe curtain on the lower half for privacy, then keep the blind mostly raised.
- Use a warm table lamp near the window. It makes slat imperfections far less noticeable than harsh overhead light.
A rental does not need to be perfect to feel beautiful. It needs to feel cared for. A blind that tilts smoothly and a window that glows softly at night will get you there faster than you think.
Cheat sheet
- Tilt not working: check for ladder twist first, then wand hook, then tilter.
- Won’t raise: cord lock angle release, then open headrail to untangle (only if comfortable).
- One ugly slat: straighten gently or swap a single slat.
- Long cord loop: secure with a cleat or wind-up today, ask for safer hardware if needed.
- Need blackout: tension rod curtains, static cling film, or adhesive-mounted shades (test first) that avoid metal headers.
When in doubt, aim for the fix that is reversible, tidy, and easy to explain if you ever need maintenance to step in.