Bidet Toilet Seat in a Rental: Leak-Free Install and Easy Move-Out Reversal
Clara Townsend
Clara Townsend is an interior stylist, vintage furniture enthusiast, and the creative voice behind Velvet Abode. With over a decade of experience transforming both cramped city apartments and sprawling fixer-uppers, she believes that a beautiful home is built on personal stories rather than massive budgets. When she isn't hunting for the perfect brass sconce at a local flea market, she can usually be found rearranging her living room for the third time this month.
There is a particular kind of luxury that feels even better when you are renting: the kind you can often install in under an hour, enjoy every day, and remove later without leaving a mark. A bidet toilet seat is exactly that, as long as you treat the water connections with respect. Translation: slow hands, the right washer in the right place, and a no-drama leak check before you declare victory.
This is my renter-friendly, leak-averse method for installing a bidet toilet seat using a T-valve, plus the exact steps for reversing it at move-out so your bathroom looks untouched.
Before you start: rental rules
Most bidet toilet seats are designed to be non-permanent upgrades: no drilling into tile, no cutting pipes, and the existing shutoff valve stays put. Still, leases vary, and condos or co-ops sometimes have building rules about plumbing changes. If your place is strict or you share plumbing stacks with neighbors, take two minutes to email your landlord or management: “I am installing a removable bidet seat that uses the existing toilet water supply via a T-adapter and will be removed at move-out.” It reads responsible, and it is.
Pick the most reversible setup
- Cold-water, non-electric bidet seat: simplest install, no outlet needed.
- Electric bidet seat: still reversible, but you need a safe outlet within reach and a tidy cord plan.
- Try to avoid tapping into a sink hot line if you want the easiest move-out. It can be done, but it adds parts and potential leak points.
Check fit before you open the box
- Toilet shape: round vs elongated matters for bidet seats.
- Mounting bolts: make sure you can access the seat bolts (some older toilets have tight clearances).
- Expectations: cold-water models use only the toilet’s cold supply. The water may feel brisk at first and then warm slightly as it runs through the line and the room.
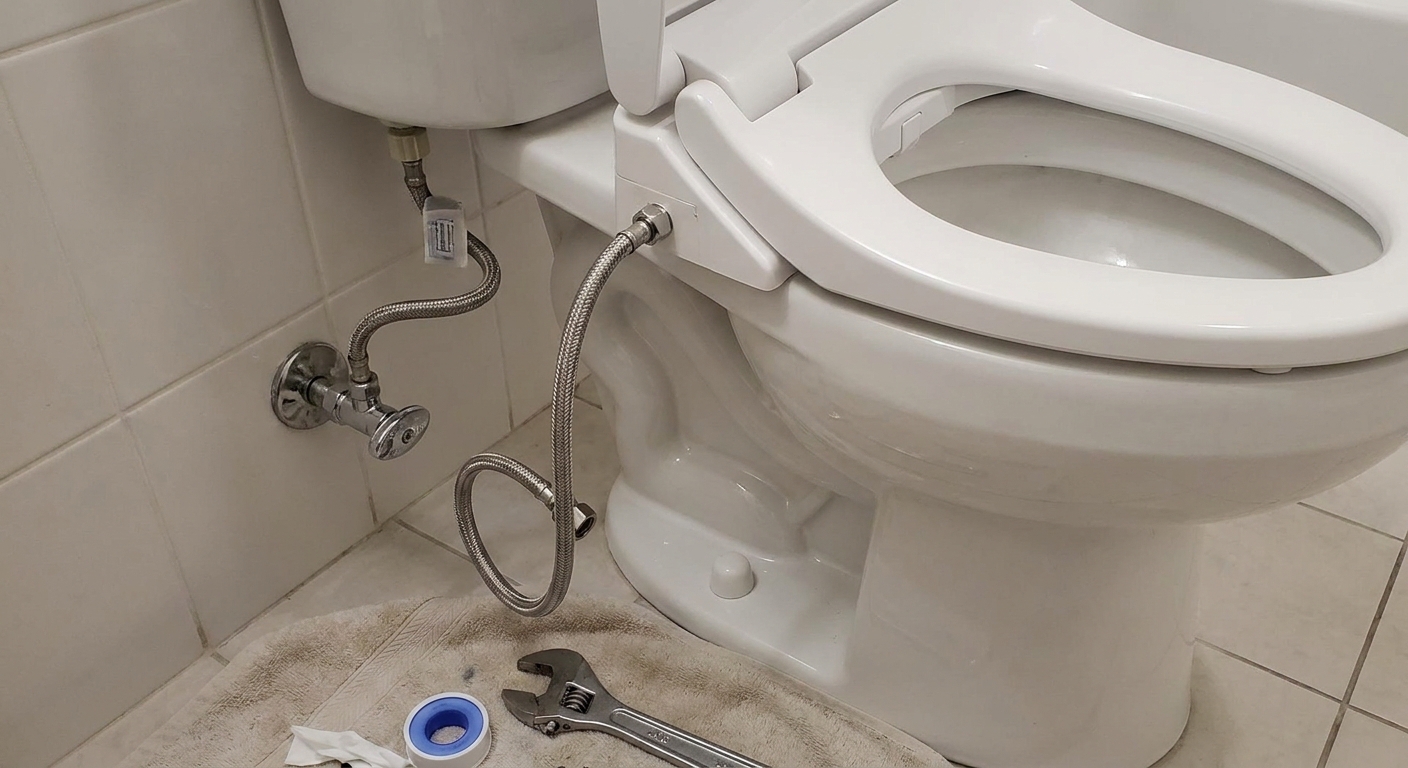
Tools and supplies
You usually do not need a toolbox that looks like a hardware store aisle. Gather this first, then start.
- Adjustable wrench or small channel-lock pliers
- Old towel or microfiber cloth
- Small bucket or shallow container
- Flashlight or phone light
- Bidet seat kit with T-valve and hoses
- Optional but recommended: a plastic drip tray or water alarm for the first 48 hours
- Optional: a spare braided toilet supply line, most commonly 7/8 inch ballcock x 3/8 inch compression. Match your shutoff valve and the tank connection before buying.
Know your parts
If plumbing vocabulary makes your eyes glaze over, this is the tiny translation that makes the rest feel simple.
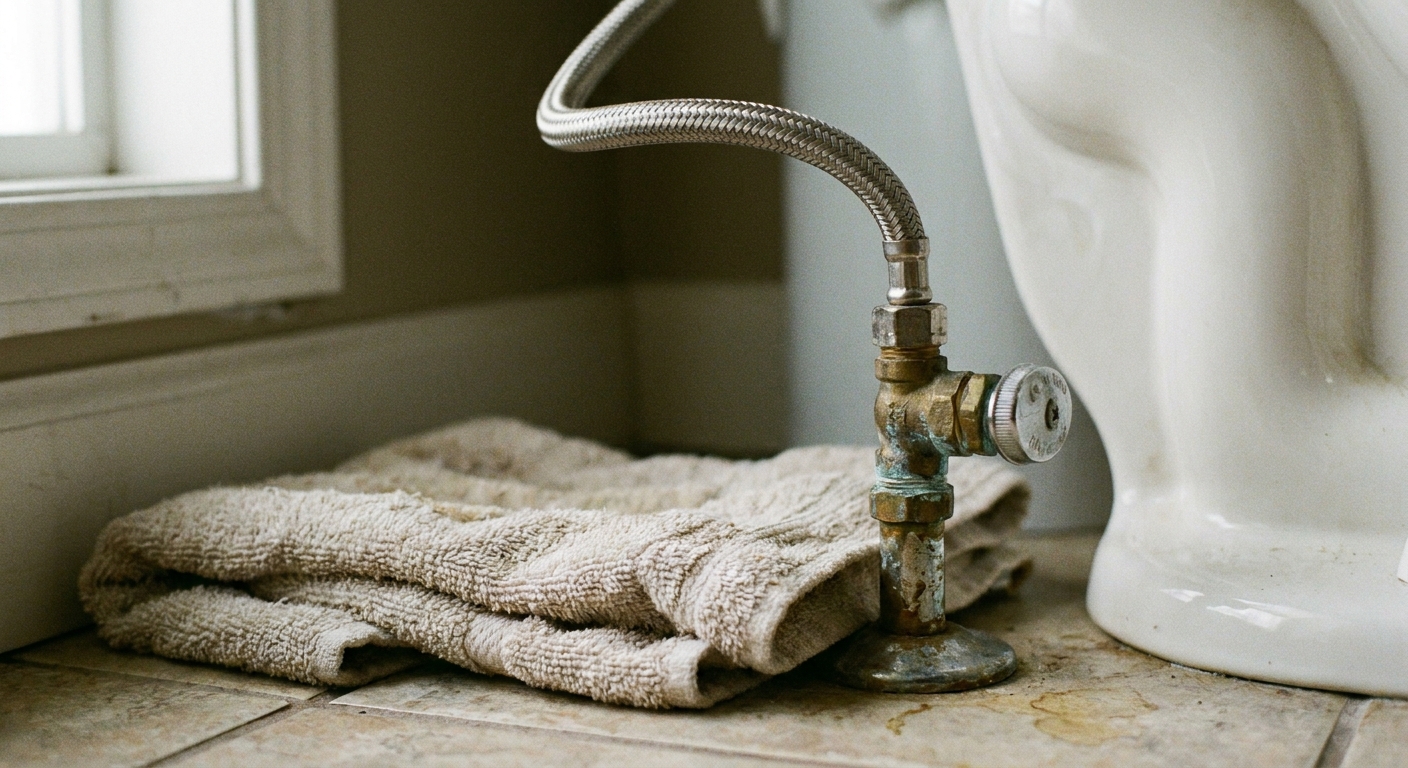
- Shutoff valve: the knob at the wall that stops water to the toilet.
- Supply line: the hose or tube from the shutoff valve to the toilet tank.
- Fill valve shank: the threaded stub under the tank where the supply line connects.
- T-valve (T-adapter): the fitting that splits the water supply, one path to the tank and one to the bidet.
Supply line types
Under most toilets you will see one of two common setups.
Flexible braided supply line (most common)
This is the silver braided hose running from the shutoff valve at the wall to the threaded inlet under the toilet tank. It is renter-friendly because it is easy to unscrew and reattach.
Rigid or semi-rigid supply line (less common)
This might look like a stiff chrome tube. You can still install a T-valve, but it can be less forgiving to align. If you have a rigid line and the angles feel forced, consider swapping to a braided flexible line for your tenancy. Save the original line in a labeled bag for move-out.
Quick rule: If anything has to be muscled into place, stop. Plumbing should feel like a gentle handshake, not arm wrestling.
Step-by-step: leak-free install
Set aside 30 to 60 minutes. Do it when you are not rushing out the door, and your future self will thank you.
Step 1: Turn off water
Turn the toilet shutoff valve clockwise until it stops. Then flush the toilet and hold the handle down to drain as much water from the tank as possible.
If the shutoff will not turn, or it turns but water still trickles into the tank: stop here. Do not force an old valve and do not keep working on a live line. This is a maintenance call, and it is a valid one.
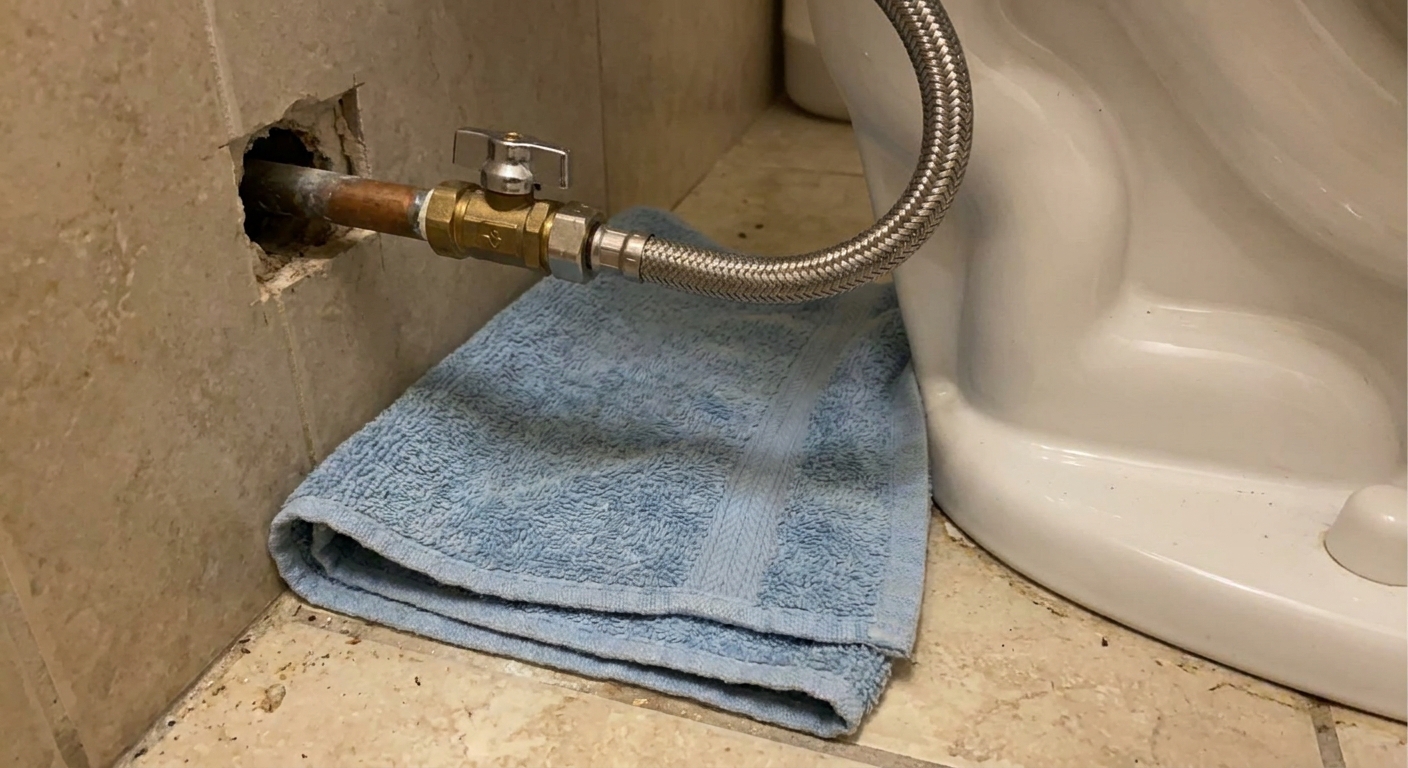
Step 2: Protect the floor
Place a towel under the shutoff valve and supply connection. Add a small bucket if you have one. Even a teaspoon of water feels dramatic on rental vinyl.
Step 3: Disconnect the supply line from the tank
Under the tank, loosen the nut at the bottom of the tank where the supply line connects to the fill valve shank. Many are hand-tight, but use a wrench if needed. Let any remaining water drip into your towel or bucket.
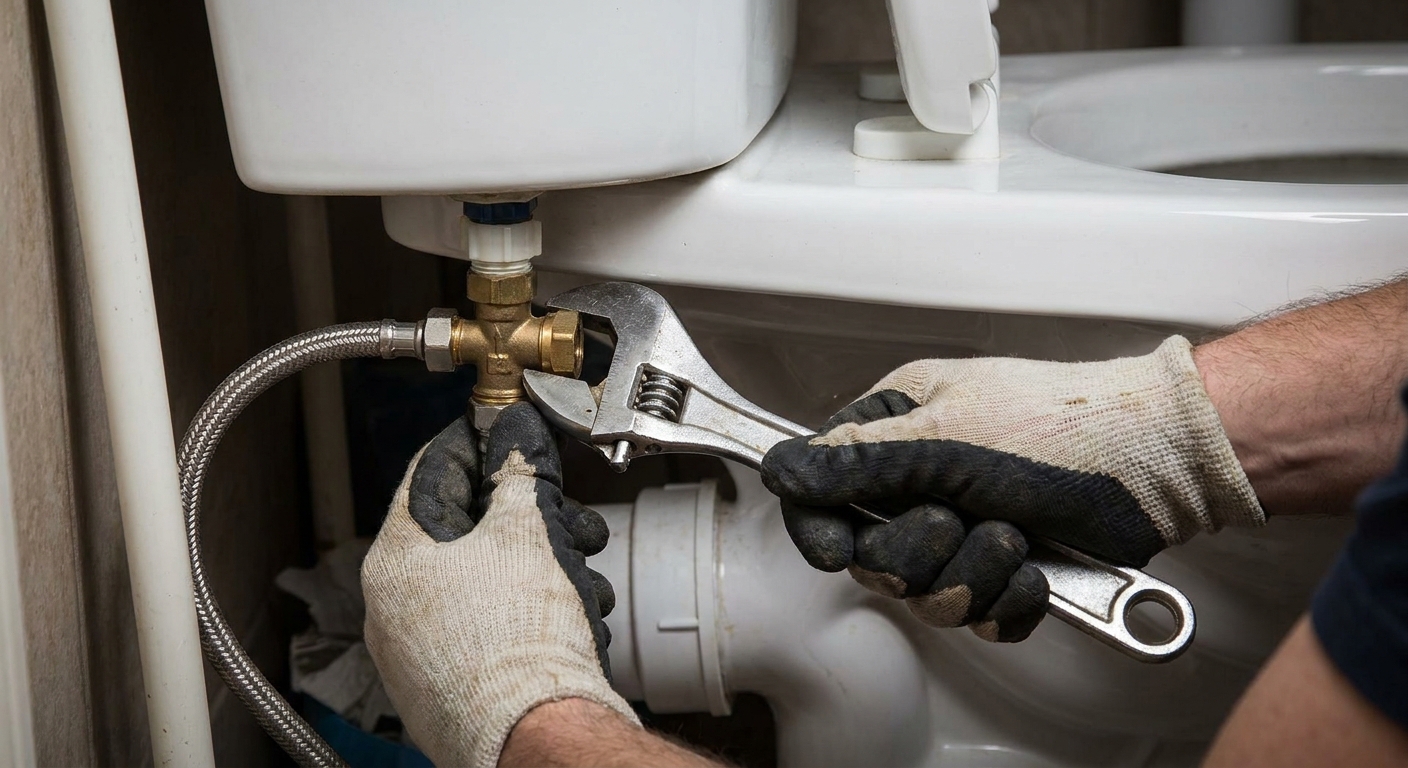
Step 4: Install the T-valve
The T-valve typically threads onto the fill valve shank under the tank. Then your original supply line threads onto the bottom of the T, and the bidet hose threads onto the side outlet.
- Start by hand. You should be able to spin the nut easily for multiple turns.
- Then snug. A common rule is hand-tight plus about a quarter turn with a wrench, only if needed.
- If you feel resistance early: stop and back it off. That is often cross-threading trying to ruin your day.
- Do not overtighten. Many leaks come from crushed washers and stressed threads, not from being “too loose.”
Step 5: Connect the bidet hose
Attach the bidet hose to the side outlet on the T-valve. Ensure the rubber gasket is seated inside the hose nut. Tighten by hand, then gently snug if your instructions call for it.
Step 6: Mount the seat and route the hose
Remove your existing toilet seat, install the bidet mounting plate, then click the seat into place. Route the hose so it is not kinked and not rubbing sharply against the wall or tank. The goal is a soft curve, like a relaxed ribbon.
Leak checks
This is the part that separates “it seems fine” from “why is there a puddle at 2 a.m.”
Turn water back on slowly
Turn the shutoff valve counterclockwise slowly. Listen and watch. Let the tank fill.
Check three places with a dry tissue
Use a dry tissue or paper towel and dab each connection. It shows moisture immediately.
- Tank to T-valve: where the T-valve threads onto the fill valve shank
- T-valve to original supply line: bottom connection
- T-valve to bidet hose: side outlet
If you see a leak, diagnose calmly
- Drip at the nut: usually a gasket issue or not snug enough. Turn water off, unscrew, check that the rubber washer is present and seated flat, then reattach.
- Drip at the threads: often cross-threading. Back it off and rethread by hand until it spins smoothly.
- Persistent seep: inspect for a cracked washer. Replace it. Many kits include spares.
Rental-safe note: Many bidet kits use hose-thread connections that seal with rubber washers, not plumber’s tape. Tape is for tapered pipe threads (often labeled NPT) and can interfere with a washer seal if used where it is not needed. Follow your bidet manual: if it calls for tape or pipe dope on an NPT connection, do that. Otherwise, let the washer do its job.
Check again after 20 minutes
Dry everything, then come back after the tank has refilled and sat for a bit. Tiny leaks like to reveal themselves with time.
Common renter trouble spots
Flexible braided line tips
- Make sure it is not twisted after reconnecting. A twist can stress the gasket and create a slow drip.
- If the hose is old, kinked, or corroded, consider replacing it during your tenancy. New hoses are inexpensive, and you can reinstall the original later.
Rigid line tips
- Alignment matters. If the T-valve changes the angle enough that the rigid line no longer meets cleanly, do not force it.
- Switch to a braided flexible line for now, then store the rigid line for move-out.
- If you are not comfortable swapping lines, this is the moment to call maintenance. You can still supply the bidet kit, and they can do the connection.
Electric seats: outlet and cord
If your bidet seat plugs in, treat it like any other small appliance, but with bathroom-level caution.
- Use a GFCI-protected outlet. Many bathrooms have one, but not all older buildings do. If you do not have GFCI protection, choose a non-electric model or ask management about options.
- Keep the cord dry and relaxed. No tight bends, no pinching under the tank.
- Unplug before removing the seat for cleaning or move-out.
- Do not run cords under rugs in the bathroom. Moisture plus hidden cord is a bad combination.

Quiet safeguards
If you are the type who hears “tiny leak” and immediately imagines a downstairs neighbor with a ceiling stain, I am with you. These small add-ons buy peace of mind.
- Plastic drip tray: Slide a shallow tray under the shutoff valve area for the first few days. If there is a slow seep, you will catch it before it becomes flooring damage.
- Water alarm: A small battery alarm near the base of the toilet can alert you to a leak fast.
- Weekly glance: For the first month, do a quick visual check whenever you clean the bathroom. Thirty seconds, tops.
Move-out reversal
The beauty of a bidet seat in a rental is that your move-out plan is basically your install steps in reverse, plus a little documentation.
Step 1: Photograph first
Take clear photos of:
- Shutoff valve and supply line connections
- Under-tank connection
- The toilet seat mounting area
This is not about paranoia. It is about having proof of the original condition and your careful work.
Step 2: Turn off water and drain the tank
Shut off the valve, flush, and hold the handle down again.
Step 3: Remove the seat and hose
Unplug if electric. Detach the bidet hose from the T-valve. Have a towel ready for a small amount of residual water in the line.
Step 4: Remove the T-valve
Unscrew the supply line from the T-valve, then remove the T-valve from the fill valve shank. Reattach the original supply line directly to the tank. Hand-tighten, then a gentle snug.
Step 5: Turn water on slowly and leak-check
Use the same tissue test at the tank connection. Dry the area and check again after 10 to 20 minutes.
Step 6: Clean and restore
A standard bidet seat install should not require holes in walls or tile. Wipe down the toilet, reinstall the original seat if you are taking the bidet seat with you, and store all parts together so your next bathroom upgrade is blissfully easy.
Troubleshooting
“It is dripping from the side outlet”
- Confirm the rubber gasket is inside the bidet hose nut.
- Reattach by hand to avoid cross-threading.
- Snug slightly more, then recheck.
“It is weeping at the tank connection”
- Turn off water, remove the T-valve, and inspect the washer.
- Make sure the washer is flat, not pinched.
- Reinstall and tighten gently. Overtightening can deform the washer and make it worse.
“My shutoff valve will not turn”
Do not force it. In older buildings, sticky shutoff valves can fail when stressed. This is a maintenance call, and it is a valid one.
“Water still runs after I shut it off”
If the tank continues to refill or you still have a steady trickle, stop. A shutoff valve that does not fully close is common in older rentals, and it is not your job to wrestle it into compliance. Call maintenance before you proceed.
“The bidet works but the toilet refills slowly”
Some T-valves have a small control dial. Ensure it is fully open, and that the hose is not kinked behind the toilet.
Final note
I love rental upgrades that feel intimate and daily, the kind you appreciate at 7 a.m. when the light is still soft and the apartment is quiet. A bidet seat is one of those upgrades. Install it slowly, check it like you mean it, and keep your original parts in a labeled bag. You get the comfort now and the clean move-out later, which is my favorite kind of design magic: the kind that leaves no trace except a happier you.