Area Rug Fringe Fraying: Stop Unraveling Before It Spreads
Clara Townsend
Clara Townsend is an interior stylist, vintage furniture enthusiast, and the creative voice behind Velvet Abode. With over a decade of experience transforming both cramped city apartments and sprawling fixer-uppers, she believes that a beautiful home is built on personal stories rather than massive budgets. When she isn't hunting for the perfect brass sconce at a local flea market, she can usually be found rearranging her living room for the third time this month.
Fringe fraying starts innocently, like one little tassel that looks a bit tired. Then you vacuum. Someone scoots a chair. The dog does a dramatic stretch. And suddenly that “one little spot” becomes a growing, messy unravel that makes your whole rug look stressed.
The good news: you can usually stop the spread quickly with a few calm steps, even if you are renting and cannot haul a rug to a repair shop tomorrow. The key is knowing what kind of edge you have, what is actually unraveling, and how to secure it without making a bigger problem later.
Quick check: what kind of rug edge is this?
Before you tape, stitch, or trim, take 60 seconds to identify what you are looking at. It helps you avoid the classic mistake of “fixing” the wrong thing.
- Hand-knotted rug: You can see individual knots on the underside and the pattern is visible (not a printed backing). Fringe is often the warp foundation extending past the rug body.
- Flatweave (kilim, dhurrie): No pile. You see interlaced threads on the back and front. Fringe is often the foundation, but some flatweaves have an added fringe finish.
- Tufted rug: The underside often has a fabric mesh plus a latex-like backing that can crack or shed over time. Fringe may be sewn on as trim.
- Machine-made: The back may look very uniform. Edges may be finished with binding tape or serging, and fringe is sometimes decorative and applied.
Helpful rule: If fringe is clearly sewn on (you can see a seam or tape attaching it), it is more likely decorative trim. If the fringe seems to be the rug’s own threads coming out of the body, it is more likely structural foundation.
Why rug fringe and bound edges unravel
Most fraying is not random. It is the result of stress hitting the same vulnerable spot again and again.
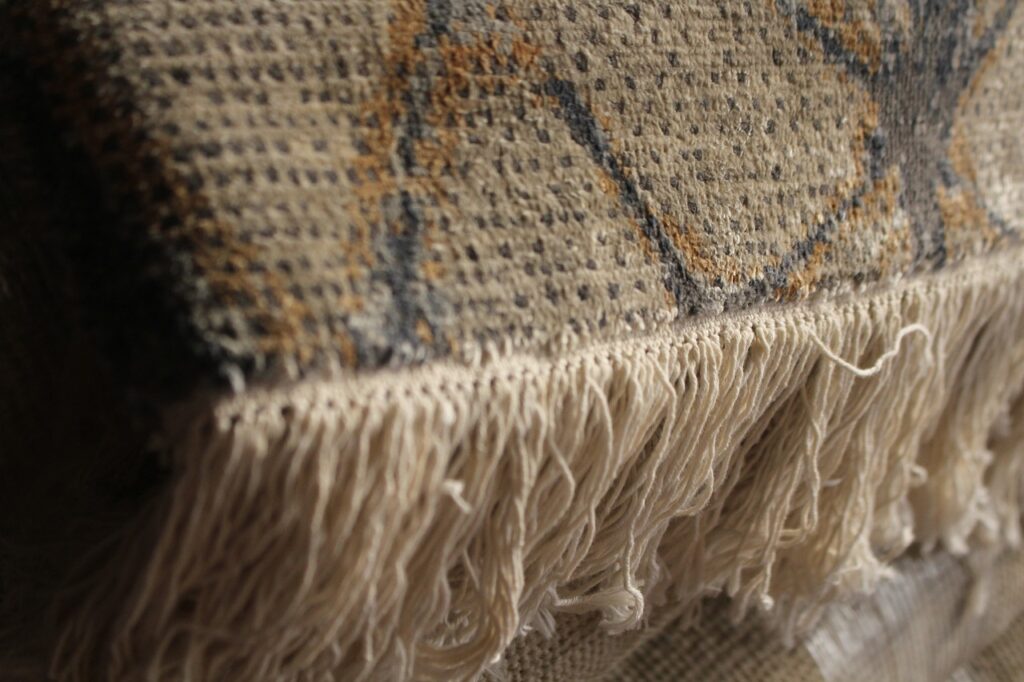
Fringe is sometimes structural, sometimes not
On many flatweaves and hand-knotted rugs, fringe is not decorative trim. It is the warp threads (the foundation) extending beyond the rug body. When those threads break, the rug can start to loosen at the end like a sweater cuff that has lost its elasticity.
But not always. Some rugs have applied fringe that is sewn on after the rug is made. In that case, fraying can still look messy, but it is less likely to threaten the rug’s internal structure.
Bound edges fail when the stitching breaks or the tape weakens
On tufted or machine-made rugs, edges are often finished with binding tape (cloth tape stitched on) or serging (a wrap-like yarn stitch that spirals around the edge). Unraveling happens when:
- Stitches pop from dragging furniture or frequent folding at the same line.
- Adhesive degrades on some bindings, especially with heat, humidity, or harsh cleaning products.
- Roomba and beater bars chew the edge, catching threads and pulling them forward.
Common culprits in real homes
- High traffic paths through doorways or next to the sofa
- Vacuuming habits (especially beater bars and vacuuming “into” the fringe)
- Pets who like to paw, chew, or nap right on the edge
- UV exposure and repeated abrasion that can weaken cotton fringe over time
- Moving the rug without support, letting the end fold under and crease
If you take one thing from this section, let it be this: fraying is mechanical. If you remove the tugging and secure the loose threads, you stop the domino effect.
First aid: stop the spread in 5 minutes
Before you tape or stitch anything, do a quick “freeze the damage” routine. This prevents you from accidentally pulling more fibers loose while you work.
- Do not vacuum the area. Not even gently. Loose threads love to get eaten.
- Shake out debris by hand or use a handheld vacuum on low suction with the nozzle just above the fibers (close enough to pick up crumbs, not close enough to grab threads).
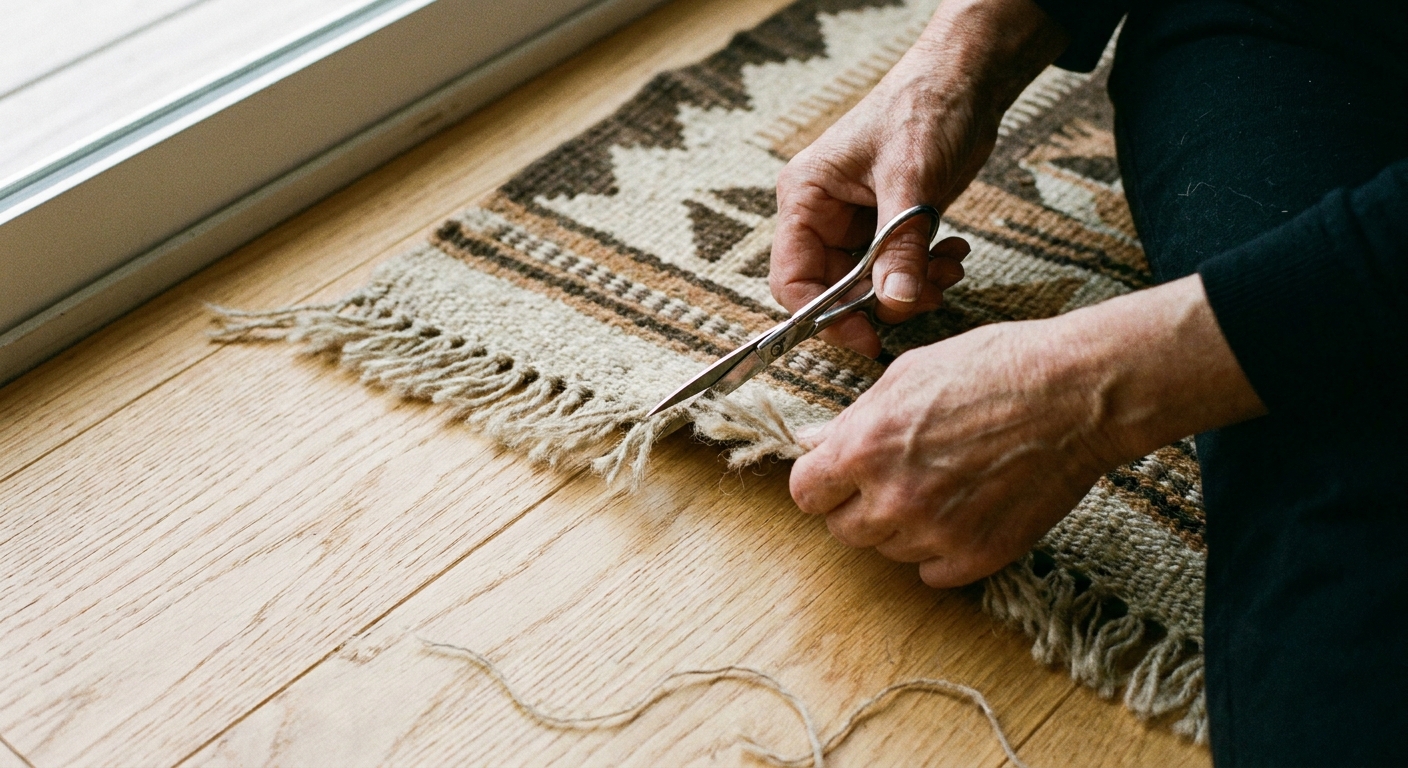
- Trim only what is truly loose. Snip fuzz and short fibers that are already detached. Do not cut long fringe strands that are still anchored at the base, and never cut foundation threads.
- Lay the rug flat and smooth the edge into its natural position. No rolling the damaged end under.
Quick safety note: Skip heat tools here. No iron, no hair dryer, no heat gun on tape, glue, binding, or synthetic backing. Heat can set stains, warp fibers, and soften adhesives in ways you will regret.
Renter-friendly fixes: tape and whipstitch
These are temporary stabilizers. Think of them like putting a bandage on a snagged sweater so it does not keep running until you can properly mend it. They are especially helpful when you need the rug to survive daily life, kids, roommates, and all.
Option 1: Fabric tape on the underside
If the edge is unraveling but the rug is otherwise healthy, an underside tape patch can hold things in place without changing how the front looks.
What the tape actually does: It presses loose threads and lifted edge fibers flat against the underside of the rug so they cannot catch and keep pulling. You are not taping the fringe tips on the front. You are securing the problem area at the base from underneath.
What you need
- Cloth tape or fabric repair tape (strong, flexible). Acid-free is a good bonus, especially for natural fibers.
- Clean cloth
- Water for wool and cotton. If you consider rubbing alcohol for some synthetics, use it sparingly and spot test carefully (it can still affect dyes, finishes, and latex-like backings).
- Books or a flat weight
How to do it
- Flip the rug back so you can access the underside of the fraying area.
- Gently align loose threads so they lie flat in their original direction. If fringe is involved, lay the base threads flat against the underside so the tape can hold them in place.
- Lightly clean the underside where the tape will sit. For wool and cotton, use a barely damp cloth and let it dry fully. If you use alcohol on a synthetic, do a tiny spot test first and avoid any latex-like backing.
- Apply tape so it bridges from stable backing to stable backing, covering the loose area without stretching the rug.
- Press firmly, then place books on top for 30 to 60 minutes.
What to avoid
- Standard clear packing tape. It can leave gummy residue and stiffen the edge.
- Duct tape. Strong, yes. Also messy later.
- Superglue. It gets brittle, can discolor fibers, and can make later repair much harder.
- Any tape on the front surface of a wool or natural-fiber rug.
Important: Even “fabric” tapes can be aggressive. Treat this as temporary, spot test first, and expect that removal later may leave residue or lift fragile fibers on older rugs.
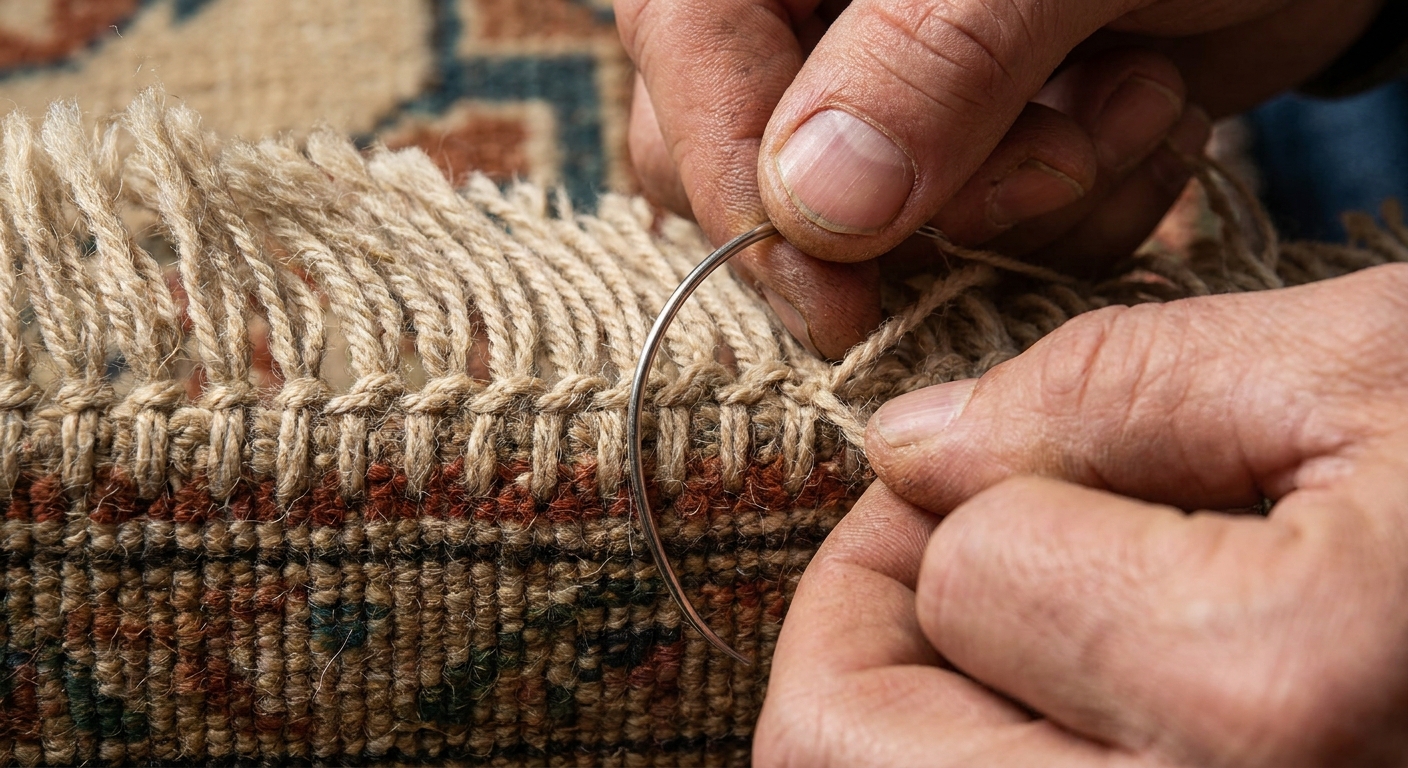
Option 2: Simple whipstitch at the fringe base
If fringe is the issue, a whipstitch can gather and secure the base of the fringe so individual strands stop running away. You are basically making a tidy “belt” that holds the foundation threads in place.
What you need
- Curved upholstery needle or large tapestry needle
- Strong thread that matches the rug (cotton, polyester, or waxed thread)
- Thimble (highly recommended)
How to do it
- Work from the underside if possible, near the base where fringe meets the rug body.
- Take small stitches that wrap over the edge, catching the foundation near the base, not the fluffy ends.
- Keep tension firm but not tight. You want stable, not puckered.
- Tie off securely on the underside, then tuck the knot into the backing area.
When whipstitch is a good idea
- You have a few inches of unraveling, not a whole end collapsing.
- The rug is a casual flatweave or a sturdy cotton rug where the stitch will blend.
When whipstitch is not enough
- Foundation threads are breaking inside the rug body.
- The rug is valuable, antique, hand-knotted, or sentimental. In those cases, the right repair is worth it.
Bound edge unraveling: do not make it worse
Bound edges can look like they are “just trim,” but they often protect the rug structure. If your binding has started to open up, the goal is to keep the binding from peeling farther and to prevent the backing from shedding.
Quick stabilize with hand tacking
If you can see binding tape lifting, you can do a few discreet hand tacks to hold it down temporarily.
- Use a needle and strong thread in a color that blends with the binding.
- Make small stitches that go through the binding tape and just barely into the backing. Avoid pulling too tight.
- Place a tack every 1 to 2 inches over the loose section.
A note on glue
I know. Fabric glue is sitting right there in the craft drawer, being extremely persuasive. But glue can seep into fibers, harden the edge, attract dirt, and make professional repair more difficult later.
If you must use an adhesive, keep it minimal, on the underside, and only on a synthetic binding tape. Avoid using glue on wool pile, cotton fringe, or anything you would cry over if it darkened or stiffened.
When to stop DIY and call a pro
Some situations are like a loose button. Others are like a torn seam in the middle of a party dress. Here is how to tell which one you have.
Call a pro if you see any of these
- Fraying has reached the rug body, not just the fringe tips.
- Warp threads are snapping or you can pull threads out easily.
- The edge is wavy or shrinking, which can indicate tension loss.
- Multiple inches of binding are missing or the backing is shedding heavily.
- It is hand-knotted, antique, silk, or heirloom. Even well-meaning repairs can lower value.
- Moths or carpet beetles are involved. You need pest treatment plus repair.
What a professional can do
- Reweave ends and rebuild fringe so it is structurally correct
- Rebind edges with matching tape or serging that flexes properly
- Color-match yarn and reinforce weak foundation areas
- Stabilize damage without stiffening or leaving residue
Tip: If you are on the fence, take clear photos of the front and underside in natural light and email a local rug repair shop. Many will tell you if it is a simple fix or a “bring it in” situation.
Vacuum and cleaning habits that prevent damage
The fastest way to undo your careful little repair is to vacuum like you always do. Fringe and bindings need a slightly gentler routine.
For fringe
- Turn off the beater bar or use a hard-floor setting.
- Vacuum parallel to the fringe, not into it.
- Use a handheld vacuum on low suction for the last inch near the edge, keeping the nozzle just above the fibers.
- Comb fringe with your fingers occasionally to keep it from tangling into clumps that snag.
For bound edges
- Do not run a robot vacuum over loose binding. It will catch, lift, and pull.
- Lift the vacuum head slightly when transitioning onto the edge so you are not ramming the binding repeatedly.
- Rotate the rug every few months so one end does not take all the stress.
Material notes: wool vs cotton
- Wool rugs: Wool is resilient, but the edge can felt or fuzz if over-agitated. Avoid aggressive brushing and harsh spot cleaners near the binding.
- Cotton fringe and bindings: Cotton tends to abrade and snap with repeated tugging. It also shows dirt quickly, so gentle, frequent maintenance beats occasional deep scrubbing.
Placement tricks that buy you time
If you need the rug to live in your home while you plan a proper repair, a few styling choices can protect the weak spot without making your room feel like a construction zone.
- Flip the rug end-for-end so the damaged fringe is under the sofa or bed, if the layout allows.
- Add a rug pad that extends close to the edge (but does not peek out). Less slip means less edge stress.
- Use furniture feet as “anchors” near, not on, the fringe line to reduce movement.
- Keep doors from scraping the edge. If the rug sits under a swinging door, trimming the door sweep or shifting the rug an inch can save the binding.

Storage that prevents fraying
Most fringe tragedies happen during moves and off-season storage, when rugs get folded like laundry and shoved into a closet.
Roll, do not fold
- Most rugs do best rolled, not folded.
- For many hand-knotted or stiffer rugs, conservators often recommend rolling with the pile facing outward to reduce stress on the foundation and help prevent cracking in stiff backings.
- For thinner, more flexible rugs (some flatweaves and many machine-made rugs), rolling with the pile facing inward can protect the surface from scuffs.
- When in doubt, choose the direction that creates the loosest, most natural roll with the least resistance. Do not force it.
- Keep fringe straight and gently tucked in so it is not sticking out like a little “handle” that gets tugged.
- Use cotton ties or wide fabric straps, not thin string that can dent the roll.
Wrap for breathability
- Use a breathable rug storage bag or cotton sheet.
- Avoid airtight plastic for long periods. It can trap moisture and lead to musty odors, mildew, and dye or fiber damage.
Pick the right spot
- Choose a dry, temperature-stable area.
- Keep rugs off basement floors where moisture fluctuates.
- If pests are a concern, check periodically and keep the area clean and well-ventilated.
Quick troubleshooting
If the fringe is just fuzzy at the ends
- Trim only loose fuzz
- Switch vacuum settings and stop vacuuming into the fringe
If fringe strands are pulling out from the base
- Stabilize with whipstitch at the base
- Consider a professional rebuild if it is spreading quickly
If binding tape is lifting
- Hand tack temporarily
- Skip glue on wool and cotton edges
If the rug edge is unraveling into the body
- Stop using the rug in that spot if you can
- Call a rug repair pro before more foundation threads break
My best “do this today” checklist
- Snip only fully loose fuzz and short detached threads, never anything anchored at the base.
- Stabilize: tape on the underside (press loose threads flat) or whipstitch at the fringe base.
- Adjust vacuuming immediately: no beater bar on edges, no vacuuming into fringe.
- Add a pad and reduce slip to reduce edge stress.
- Avoid heat and superglue. Keep adhesives minimal and temporary.
- If the damage has reached the rug body, get a professional opinion sooner than later.
A rug does not need to be perfect to be beautiful. It just needs to be secure enough to keep telling its story without literally coming apart at the seams.